Managing Appointments
Book, filter, edit, reschedule, and cancel appointments — all from the calendar.
The Appointments calendar
In this article
Calendar Views
Switch between views using the buttons in the top-right of the Appointments page:
| View | What you see |
|---|---|
| Today | A timeline of today's appointments by hour. |
| Week | 7-day view. Use the arrow buttons to navigate between weeks. |
| Monthly | Full month overview. Use the arrow buttons to navigate months. |
Creating a Booking
Click an empty time slot on the calendar and select Add appointment from the popup, or click the + Book button.
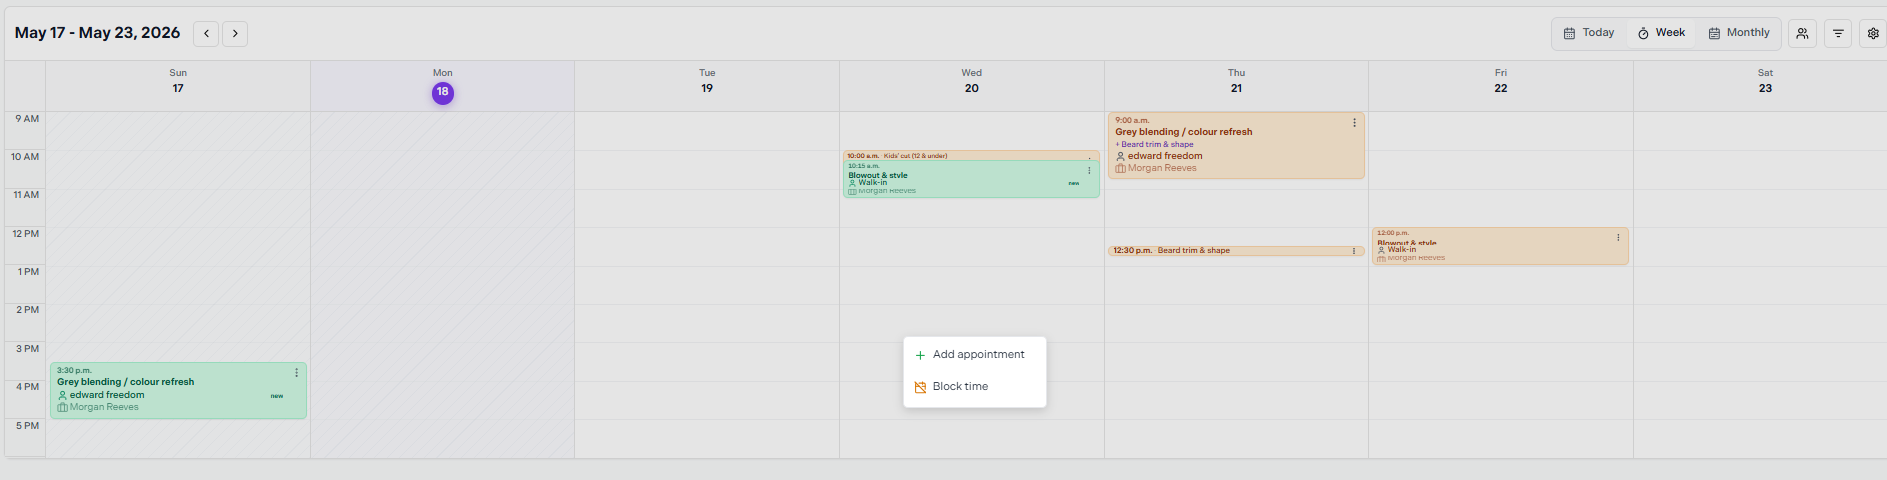
Click an empty slot to get the Add appointment / Block time popup
The New Appointment form opens with the time pre-filled. Fill in the following fields:
Date & Start time
Pre-filled from the slot you clicked. Adjust if needed.
Service
Select the service from the dropdown.
Provider
Select the staff member providing the service.
Client
Search by name or email. If the client doesn't exist yet, click Can't find them? Add new client.
Notes (optional)
Add any relevant notes for this booking.
Click Create appointment
The appointment appears on the calendar immediately.
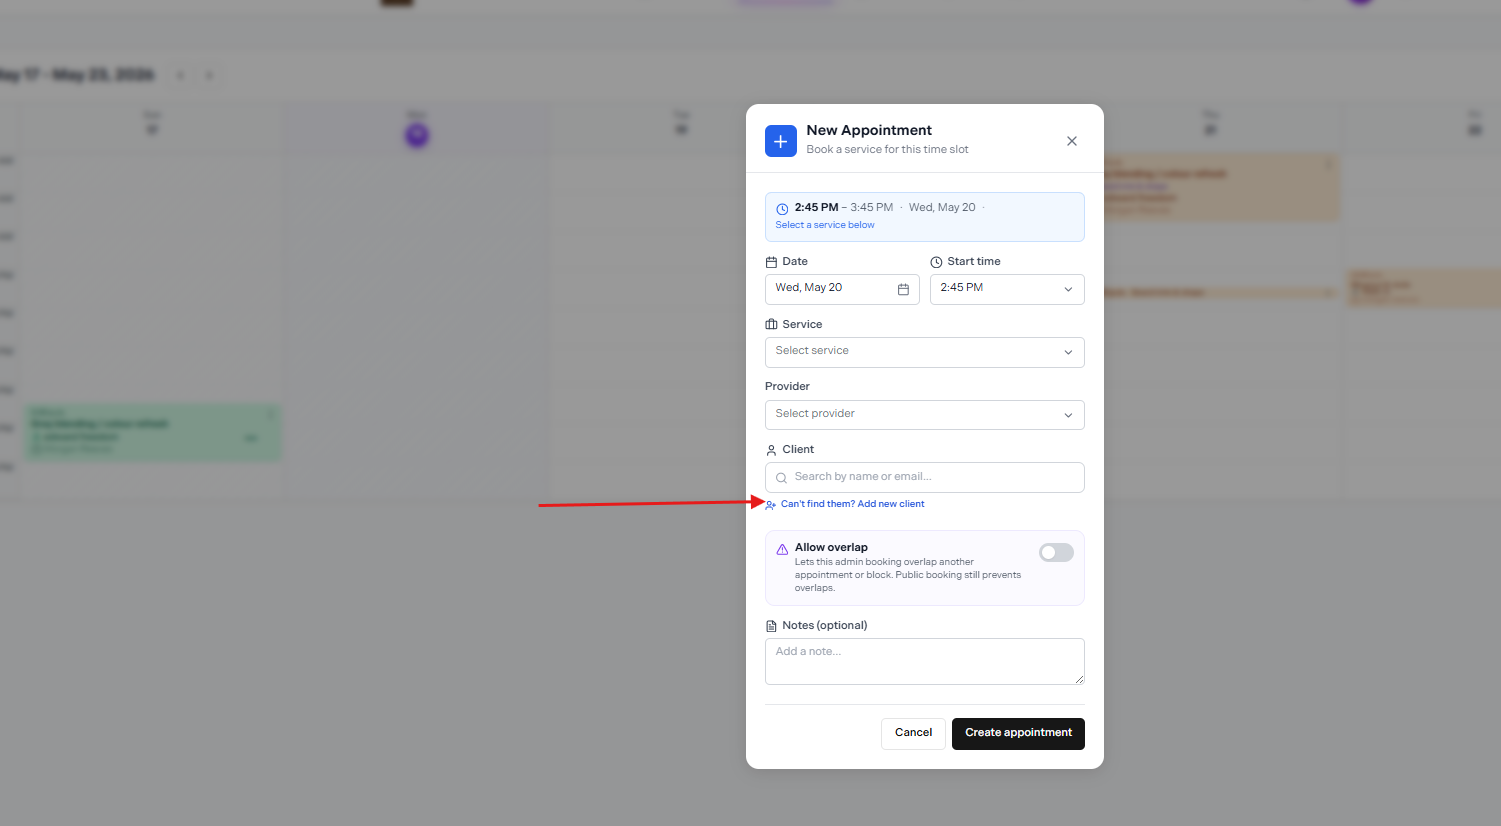
The New Appointment form — click "Can't find them? Add new client" to add a client on the spot
Allow overlap
The Allow overlap toggle lets this admin-created booking overlap another appointment or block. Public booking still prevents overlaps.
Walk-in (No Contact) Bookings
For clients who don't need a profile, click Can't find them? Add new client in the Client field, then click Walk-in (no contact).
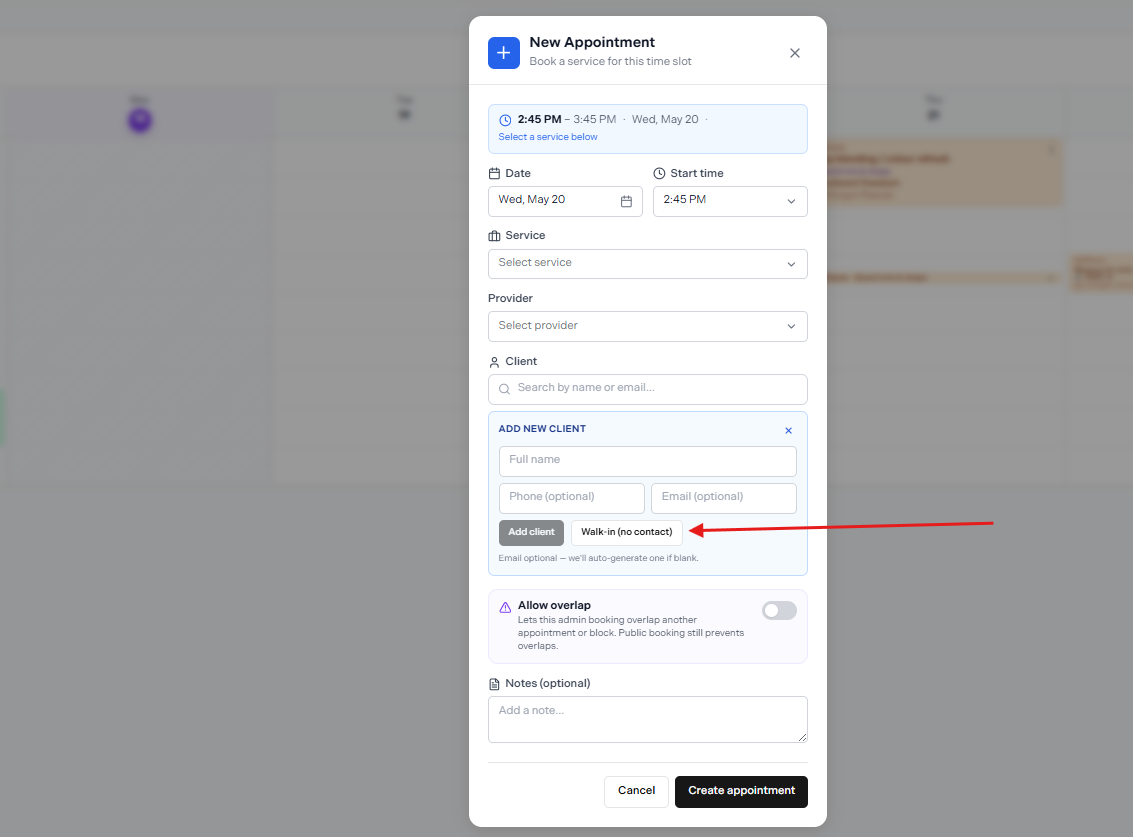
Use "Walk-in (no contact)" to book without creating a client profile
Adding a new client on the spot
If you want to create a full profile, fill in the Full name, Phone (optional), and Email (optional) fields, then click Add client. Email is optional — Nuvoro will auto-generate one if left blank.
Filtering by Staff
Click the staff icon in the top-right of the calendar to filter the view by one or more team members.

The staff filter icon is in the top-right corner of the calendar
A dropdown appears with a checklist of your staff members. Check the names you want to see and click Done.
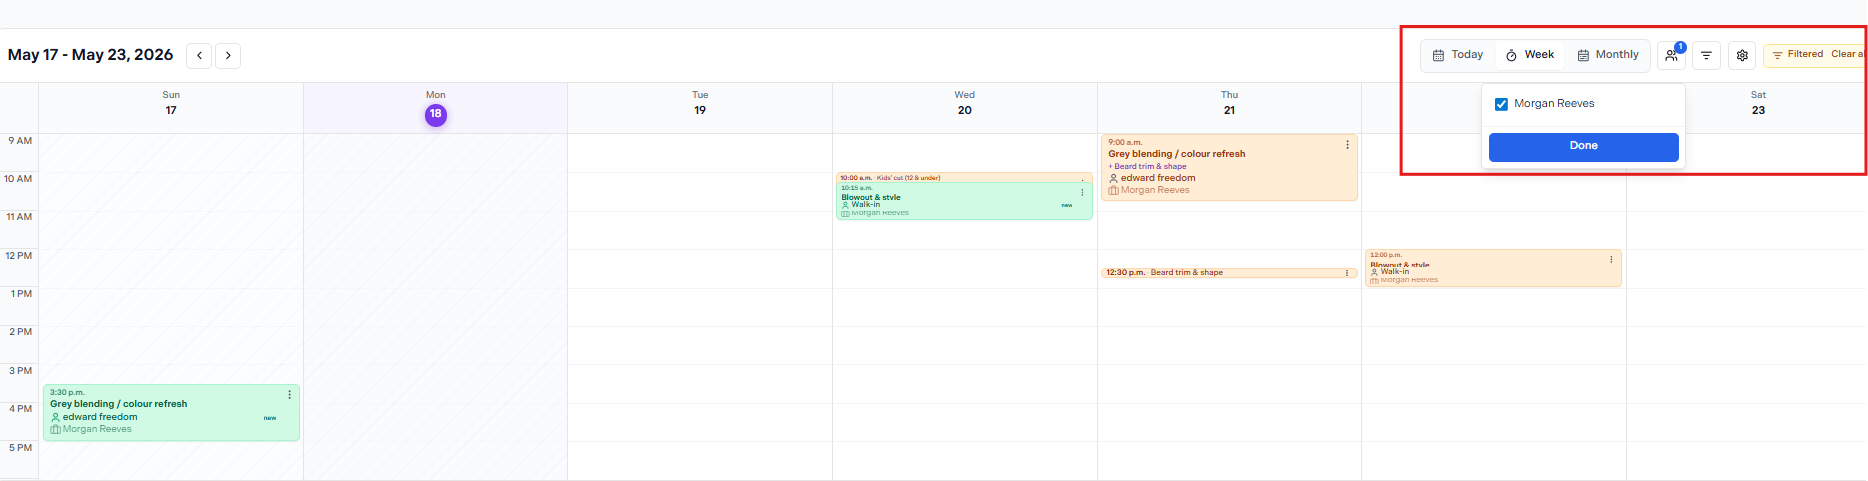
Select one or more staff members and click Done — the header shows "Filtered" with a Clear all option
Clearing the filter
When a filter is active, Filtered and a Clear all link appear in the top-right header. Click Clear all to return to the full calendar view.
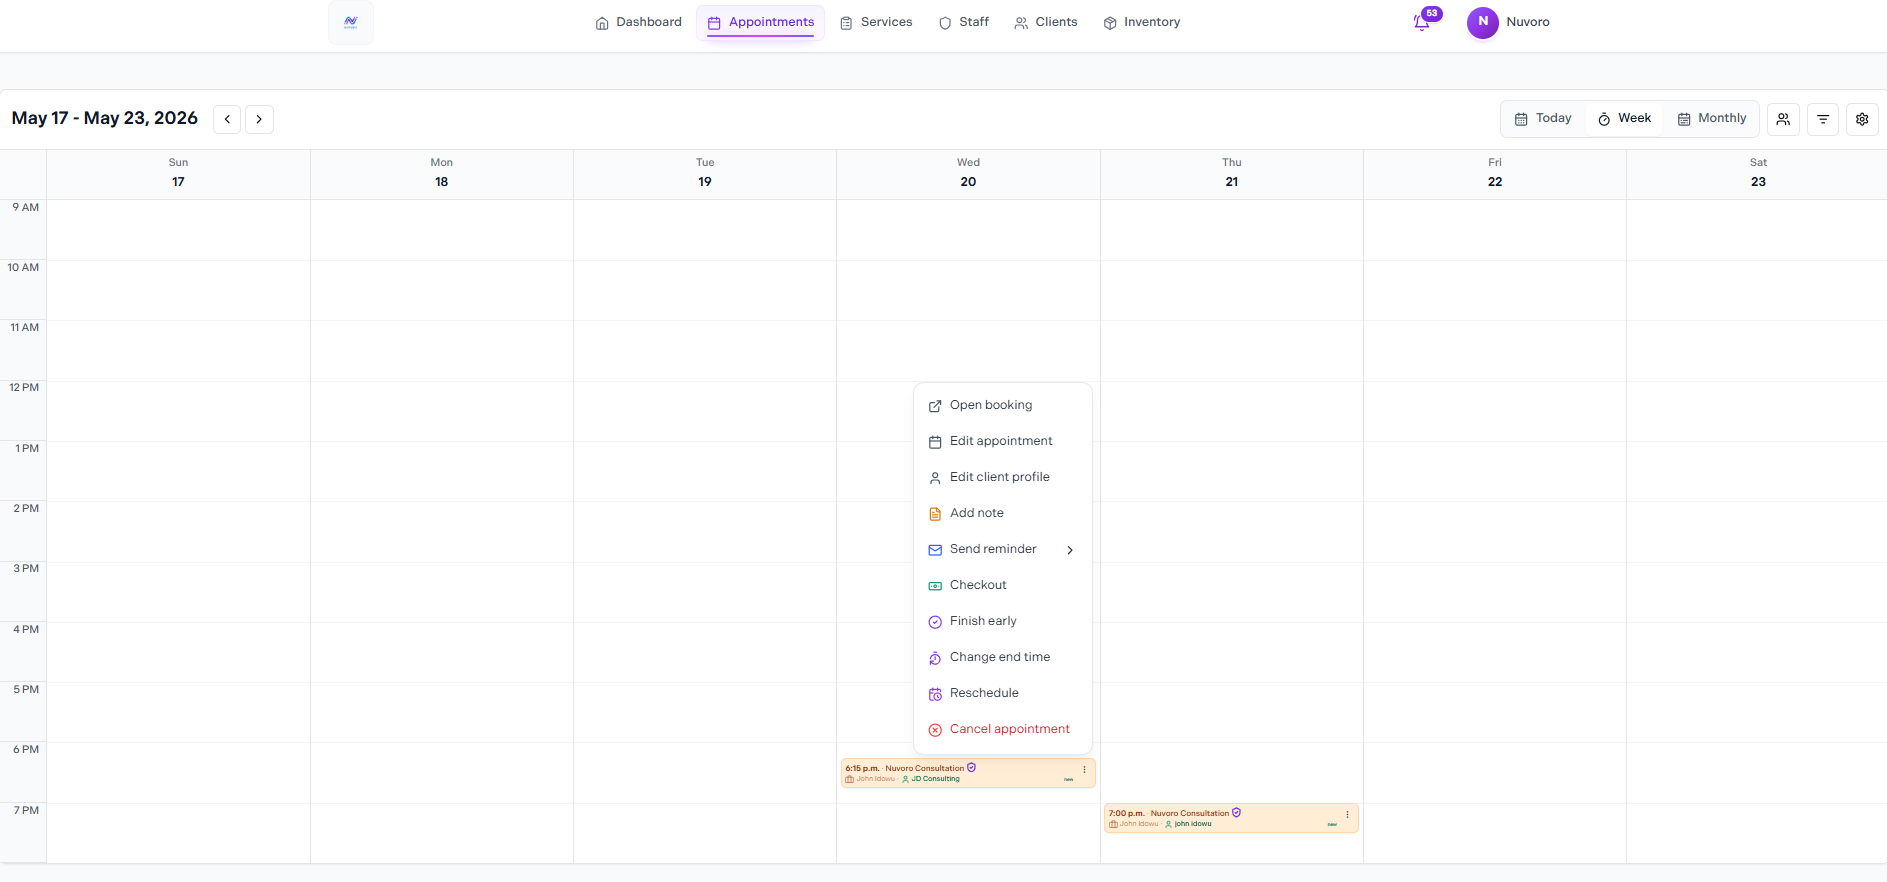
Appointment Actions Menu
Click the ⋮ three-dot icon on any appointment, or right-click it, to open the actions menu.
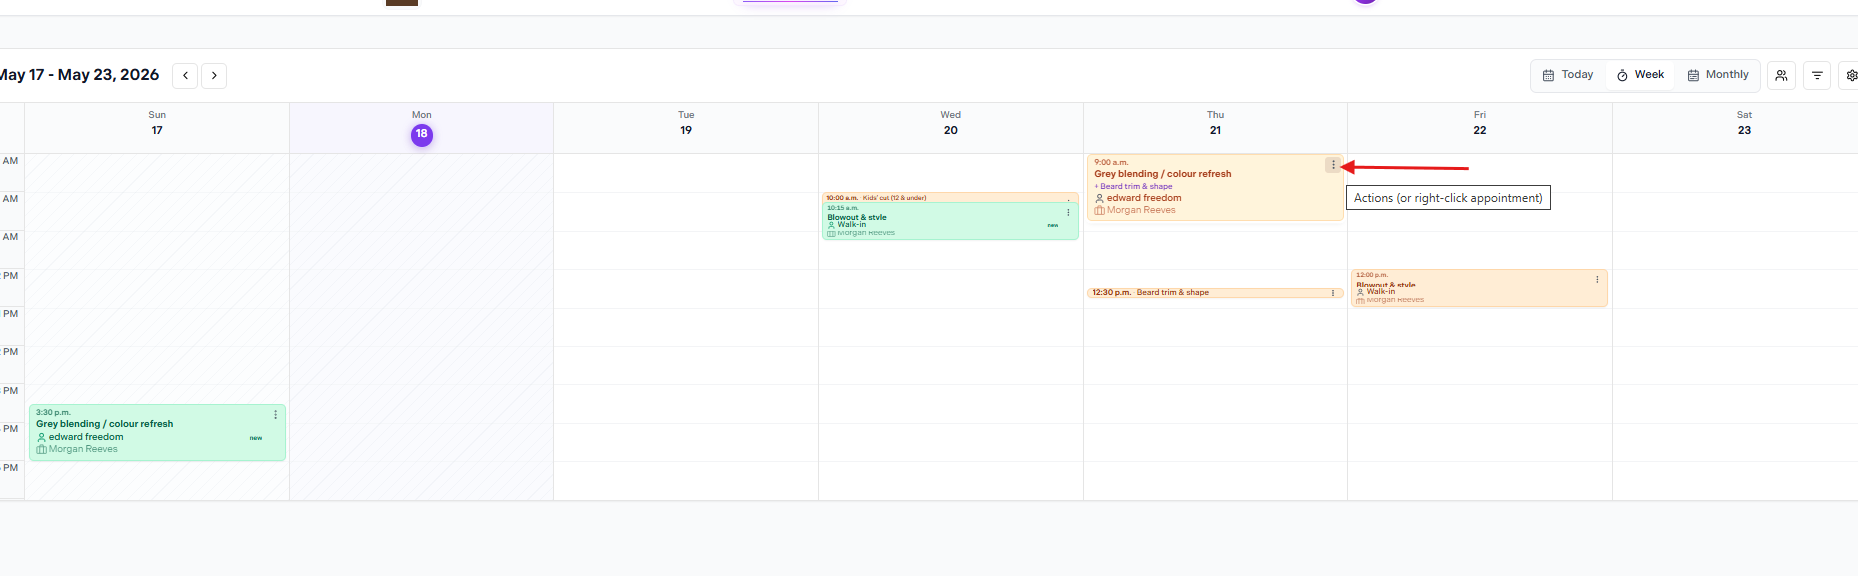
Click ⋮ or right-click the appointment to open the actions menu
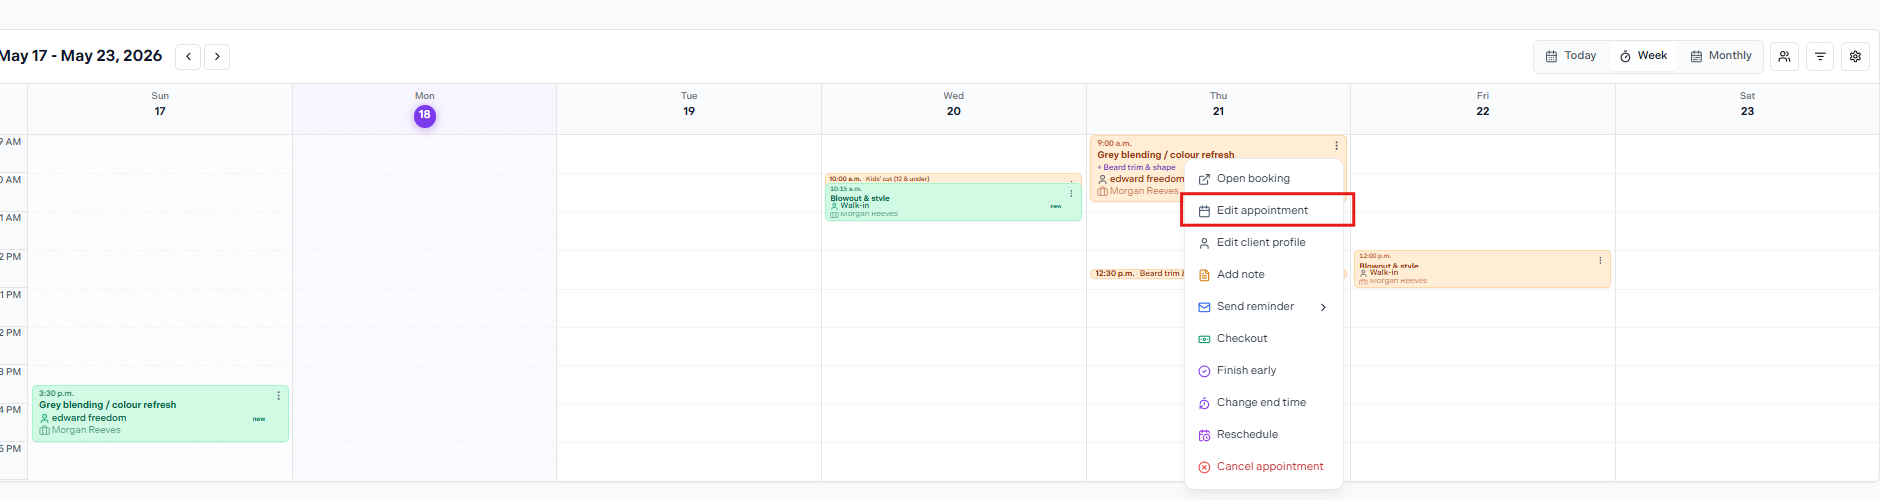
The full actions menu
| Action | What it does |
|---|---|
| Open booking | View the full appointment details. |
| Edit appointment | Change the booked service. |
| Edit client profile | Jump directly into the client's profile. |
| Add note | Add a staff-only note to this appointment. |
| Send reminder | Manually send a reminder to the client now. |
| Checkout | Mark the appointment complete and collect payment. |
| Finish early | End the appointment at the current time. |
| Change end time | Adjust the end time on the calendar without completing the appointment. |
| Reschedule | Move the booking to a new date and time. |
| Cancel appointment | Remove the booking. Shown in red at the bottom of the menu. |
Editing an Appointment
Select Edit appointment from the actions menu. The edit form lets you change the booked service only.
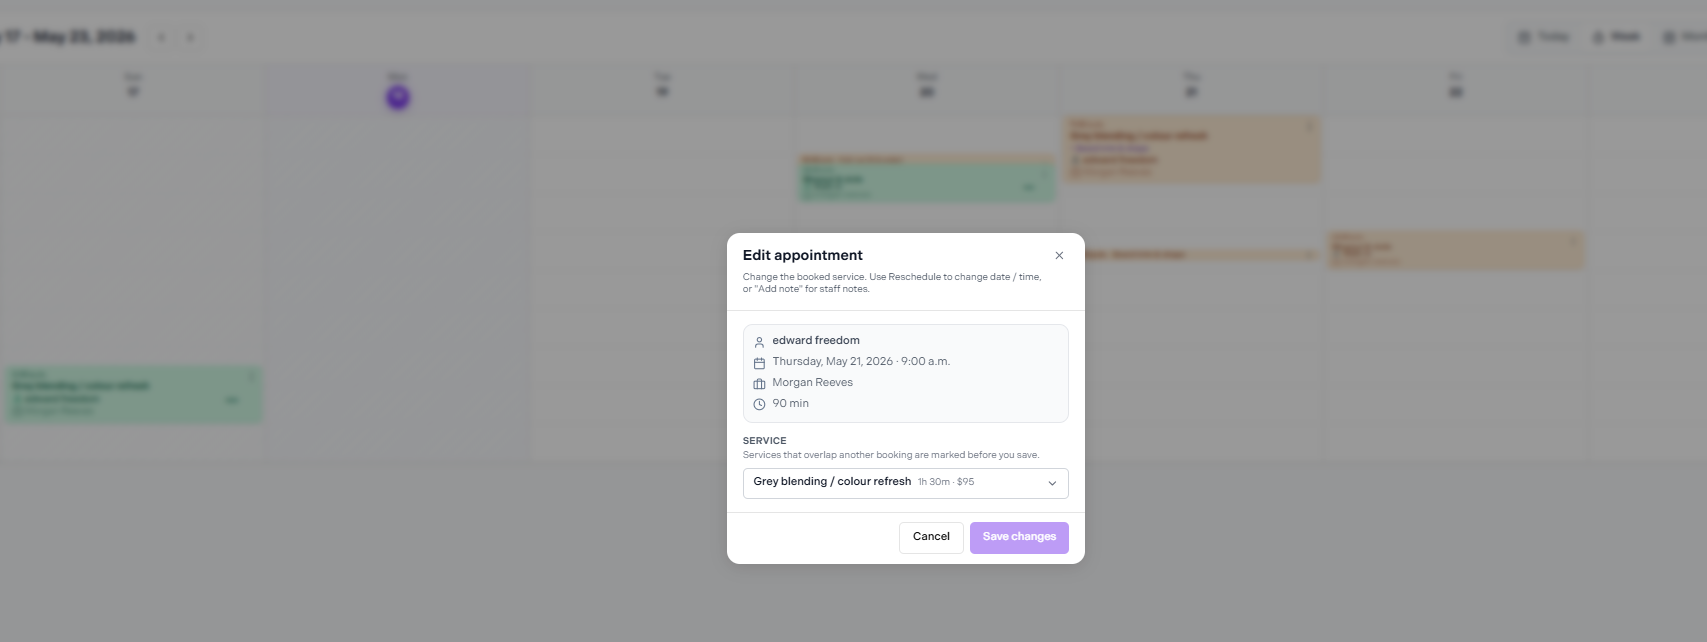
Edit appointment — only the service can be changed here
Need to change the date or time?
Use Reschedule to move the booking to a different date or time. To add a staff note, use Add note — not Edit appointment.
Editing a Client Profile from the Calendar
Select Edit client profile from the actions menu to jump directly into that client's profile without leaving the calendar.
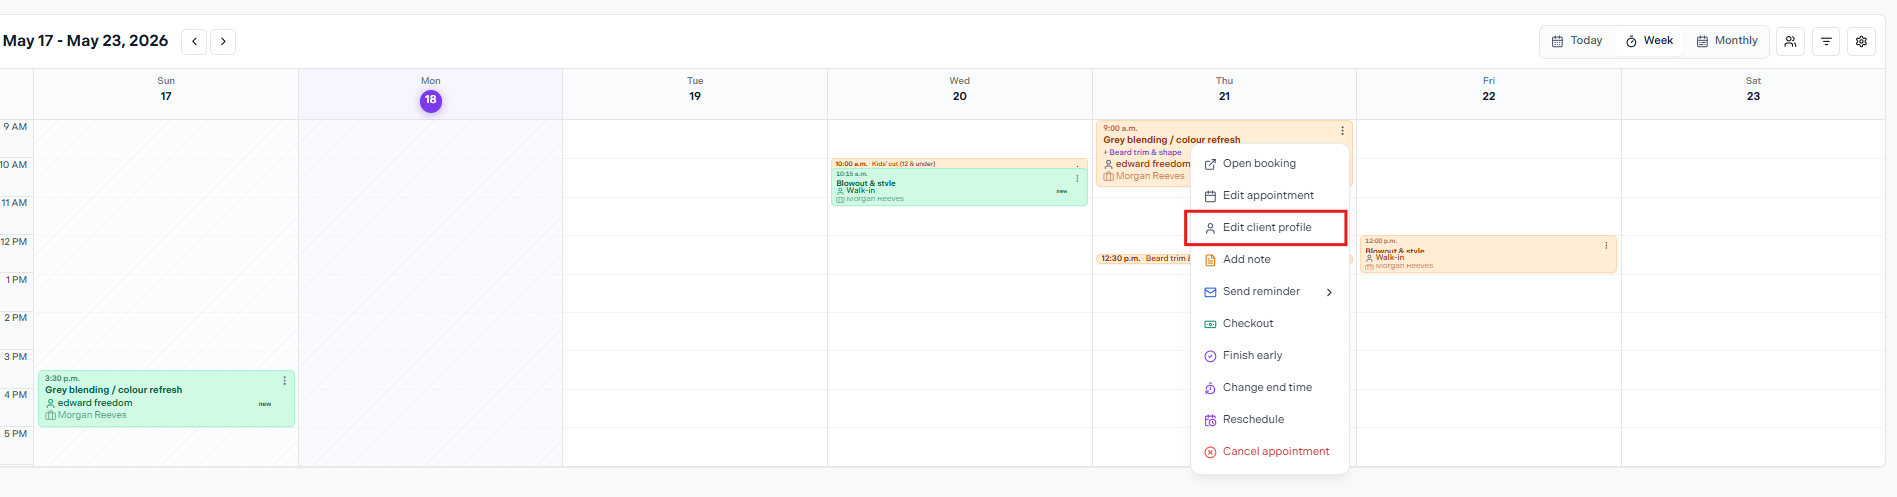
Edit client profile opens the client record directly from the calendar
Adding a Note
Select Add note from the actions menu. A modal opens showing the appointment name and date — type your note and click Add Note.

Select Add note from the actions menu
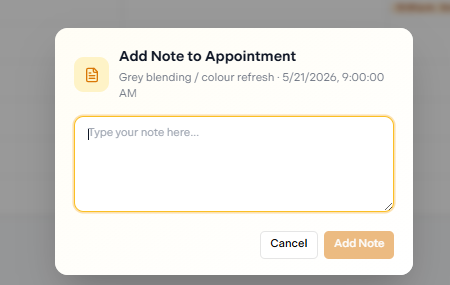
Type your note and click Add Note to save
Notes are staff-only
Appointment notes are never visible to clients.
Finish Early & Change End Time
Both options appear in the actions menu and adjust the appointment's duration on the calendar.
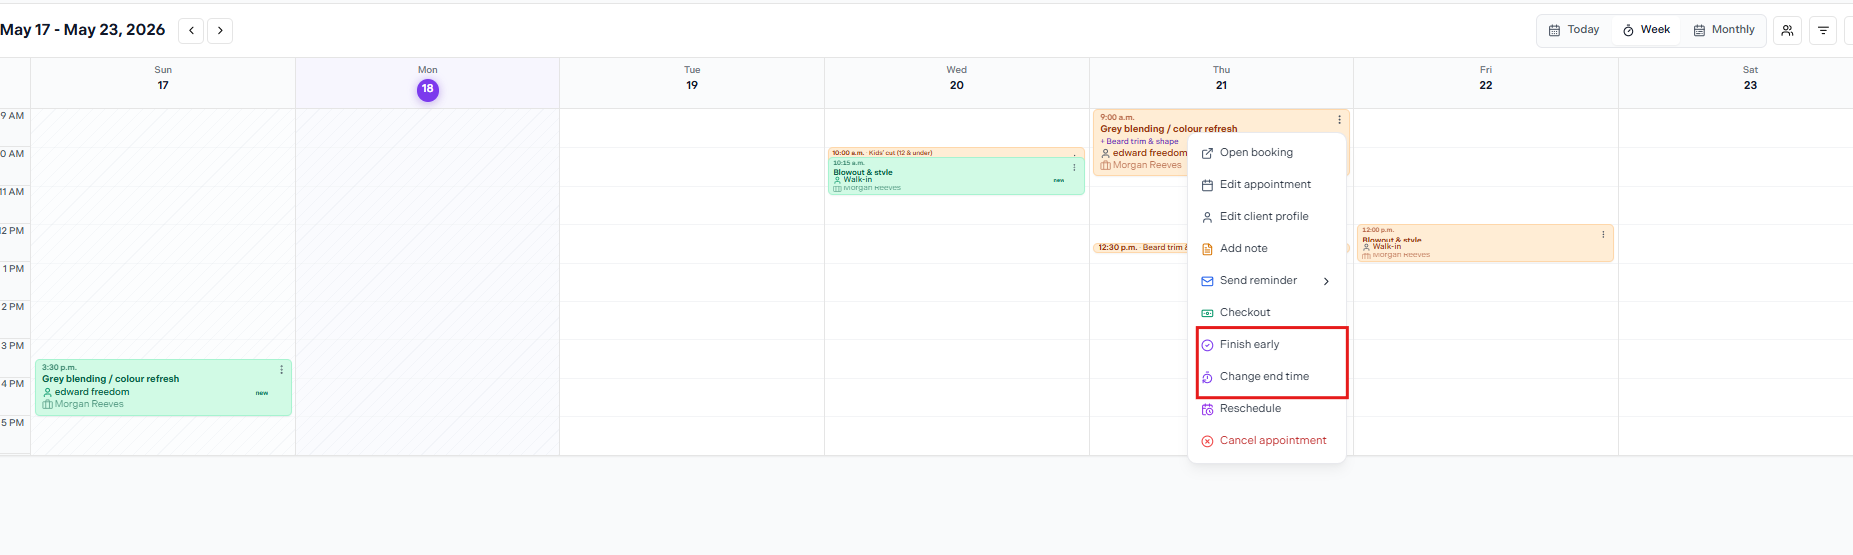
Finish early and Change end time are both in the actions menu
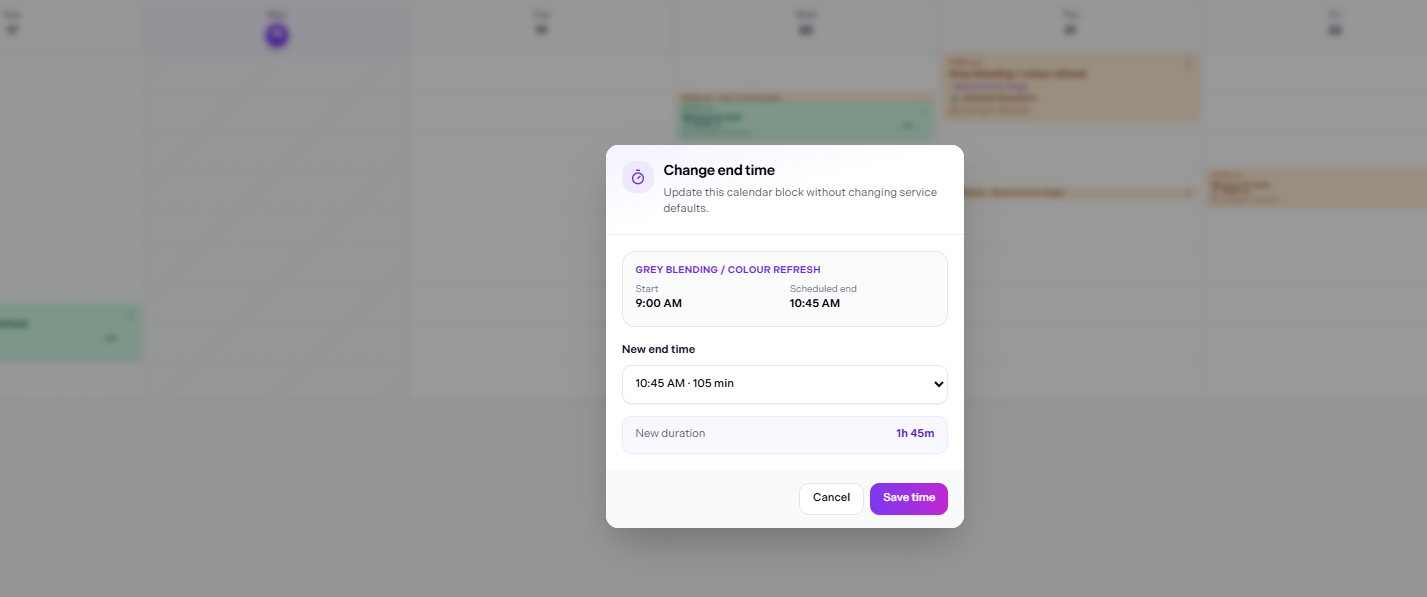
Change end time — shows the original start and scheduled end, then lets you pick a new end time
| Option | What it does |
|---|---|
| Finish early | Ends the appointment at the current time immediately. |
| Change end time | Opens a modal showing the start and scheduled end time. Pick a new end time from the dropdown — the new duration is calculated automatically. Click Save time to confirm. This updates the calendar block only and does not change the service defaults. |
Rescheduling an Appointment
Select Reschedule from the actions menu. A modal opens showing the current booking details and a date picker.
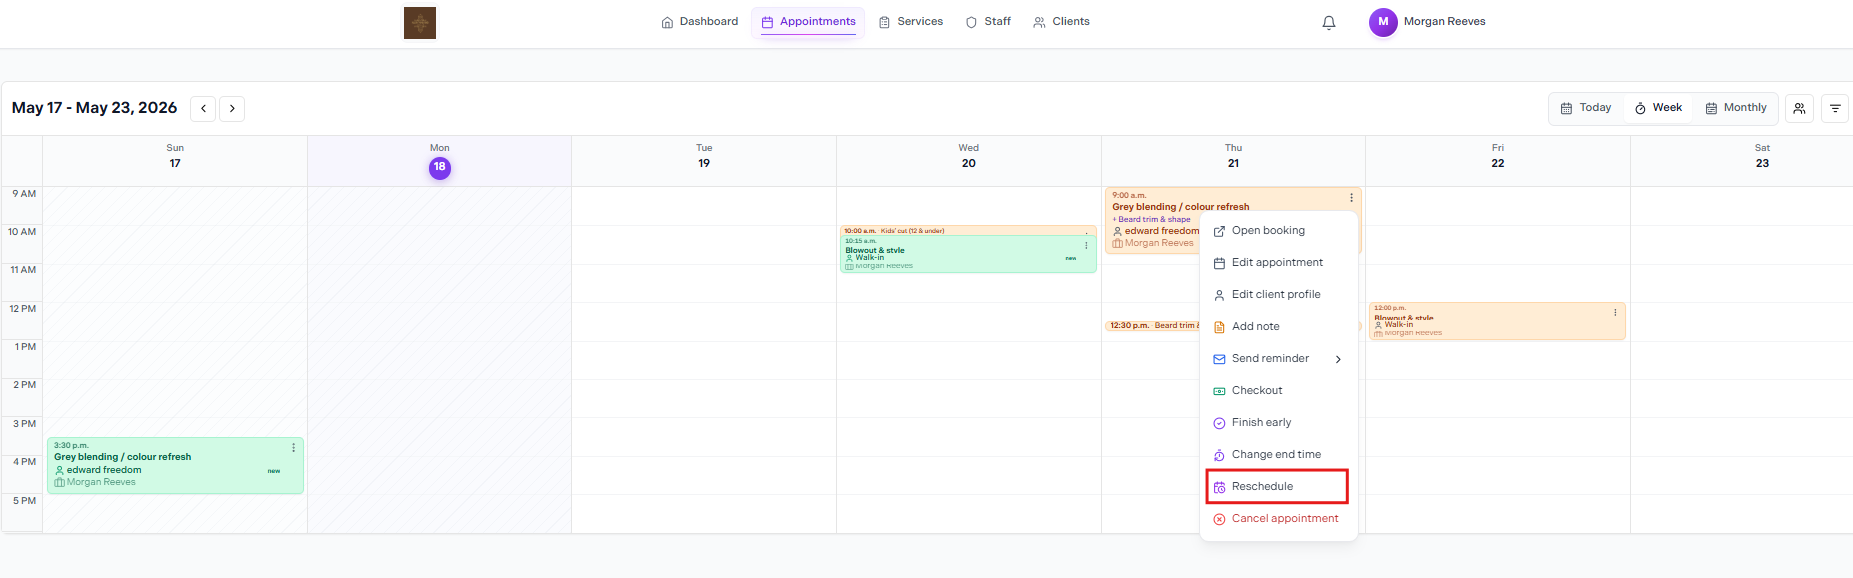
Select Reschedule from the actions menu
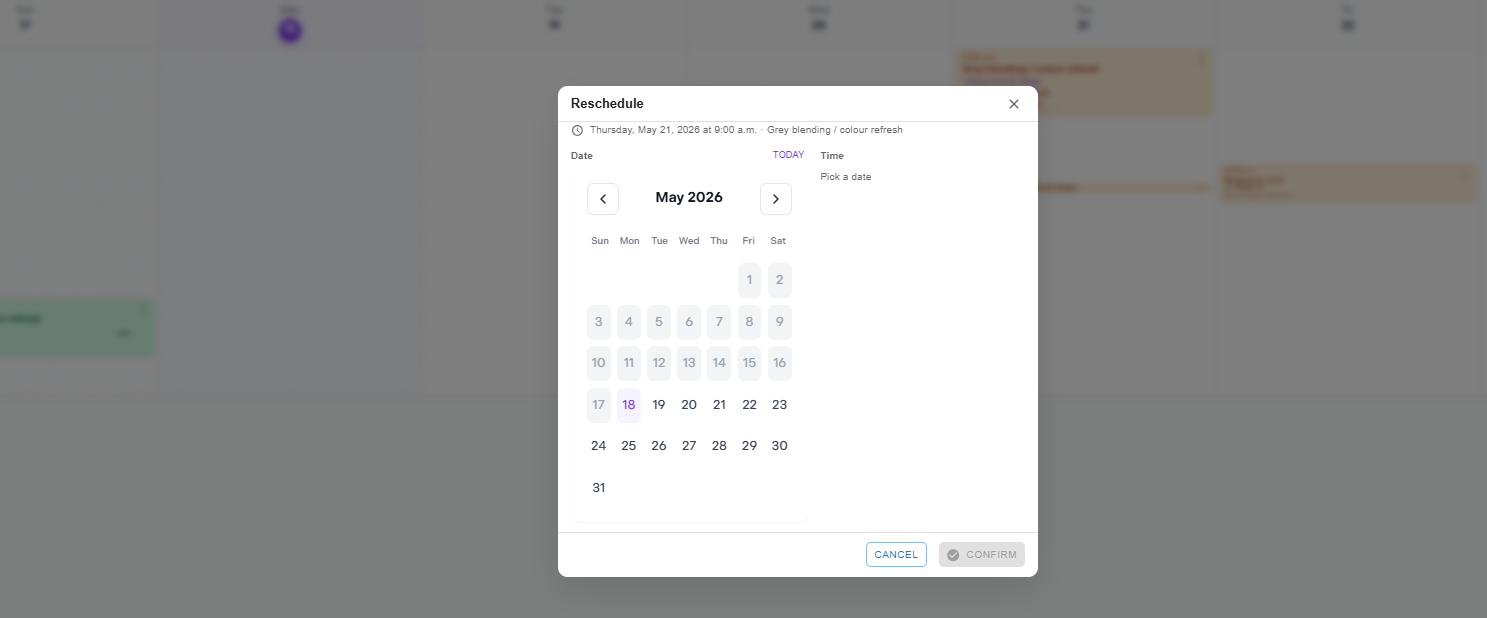
Pick a new date — the Time section becomes available once a date is selected. Click Confirm to save.
Time selection
The Time field is only available after you select a date. Once both are chosen, click Confirm to move the booking.
Cancelling an Appointment
Select Cancel appointment from the bottom of the actions menu (shown in red). You'll be asked to confirm before the booking is removed.
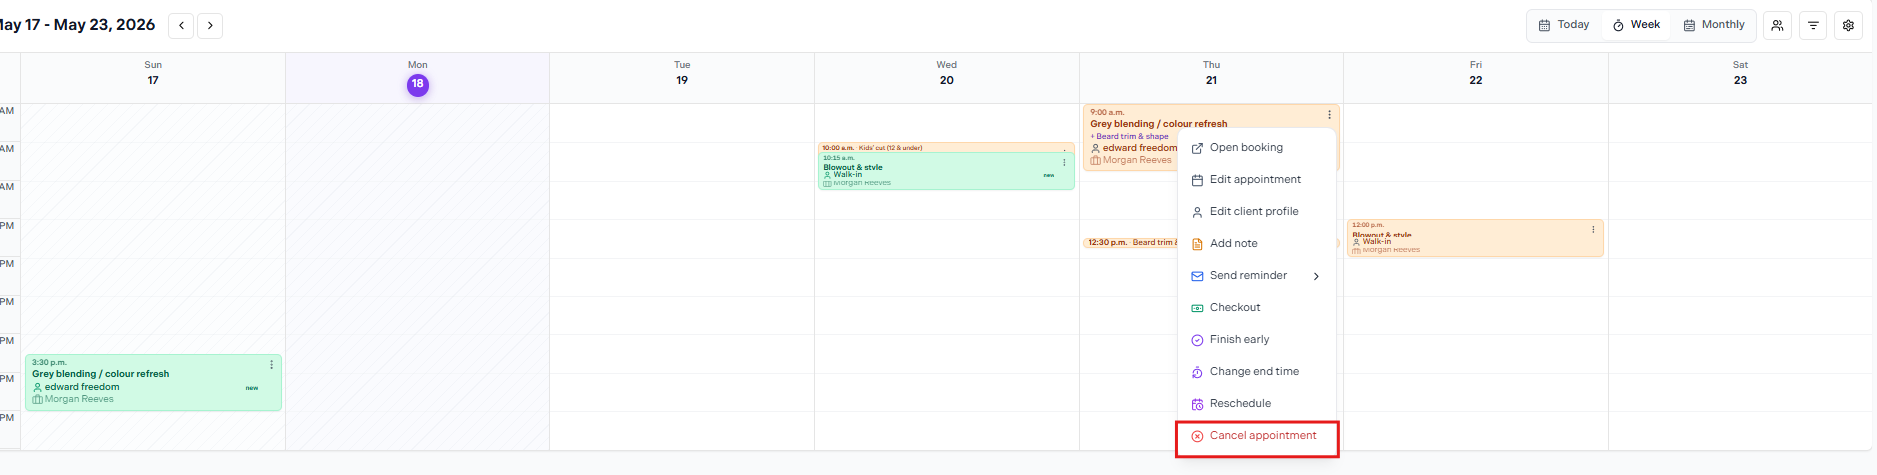
Cancel appointment is at the bottom of the actions menu, shown in red
Client self-cancellation
Whether clients can cancel their own bookings is controlled in Settings → Booking Rules → Cancellation Policy. If a minimum notice window is set, clients cannot cancel within that window — only staff can.