Managing Staff
Fill out a staff profile, set availability, block time off, and remove team members — everything you need to manage your team in Nuvoro.
Edit Staff form — key fields and settings
In this article
Profile & Basic Information
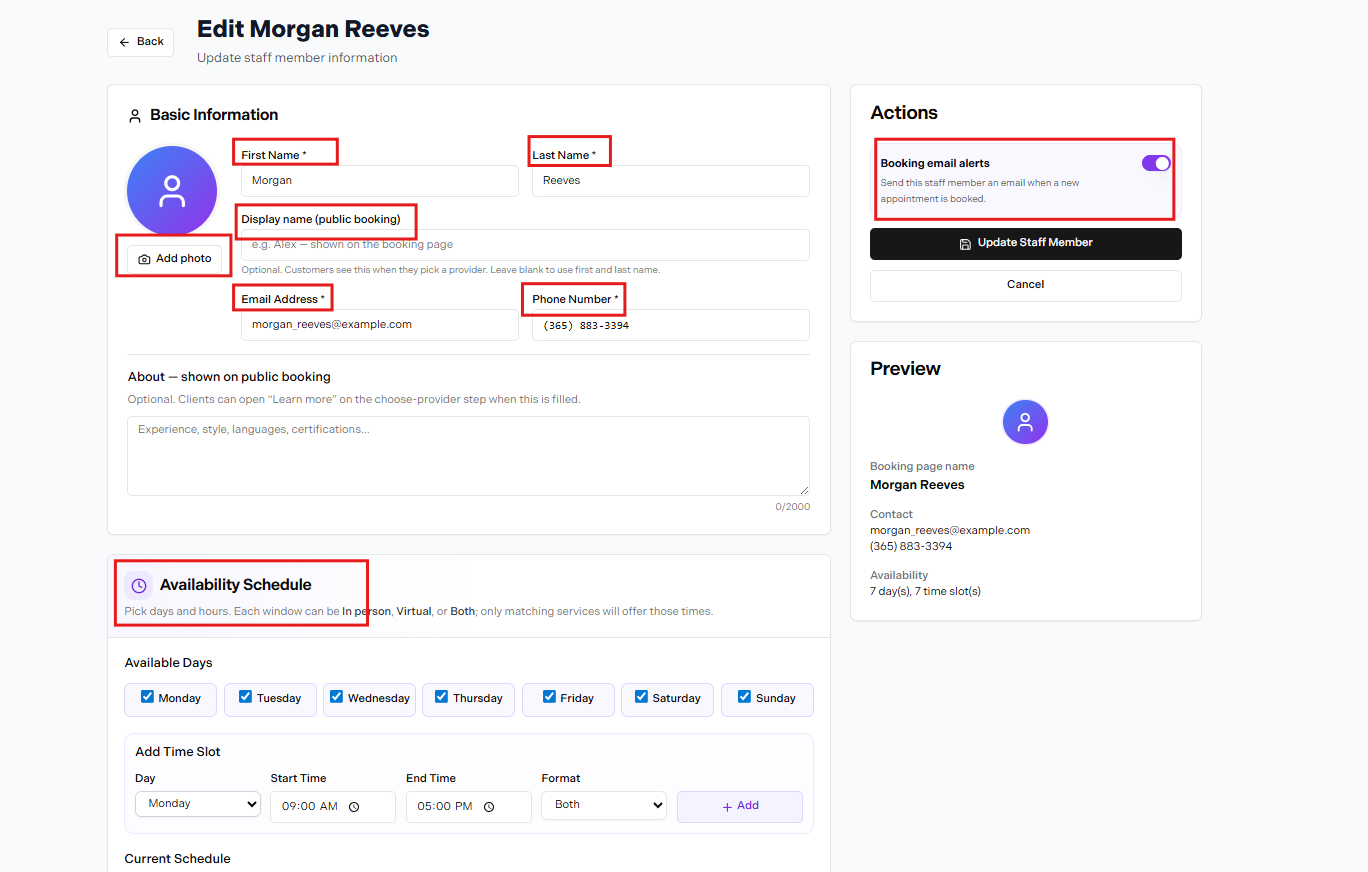
The Edit Staff form contains all the core fields for a team member. The checklist below shows what's available and what's required.
| Field | Notes |
|---|---|
| First Name * | Required. |
| Last Name * | Required. |
| Display name (public booking) | Optional. What clients see on the booking page. Leave blank to use first and last name. |
| Add photo | Optional. Shown on the booking page and calendar. |
| Email Address * | Required. |
| Phone Number * | Required. |
| About — shown on public booking | Optional. Up to 2000 characters. |
| Booking email alerts | Toggle in the Actions panel. Sends the staff member an email when a new appointment is booked. |
| Availability Schedule | Set available days and time slots. Each slot can be In person, Virtual, or Both. |
Display Name vs. Legal Name
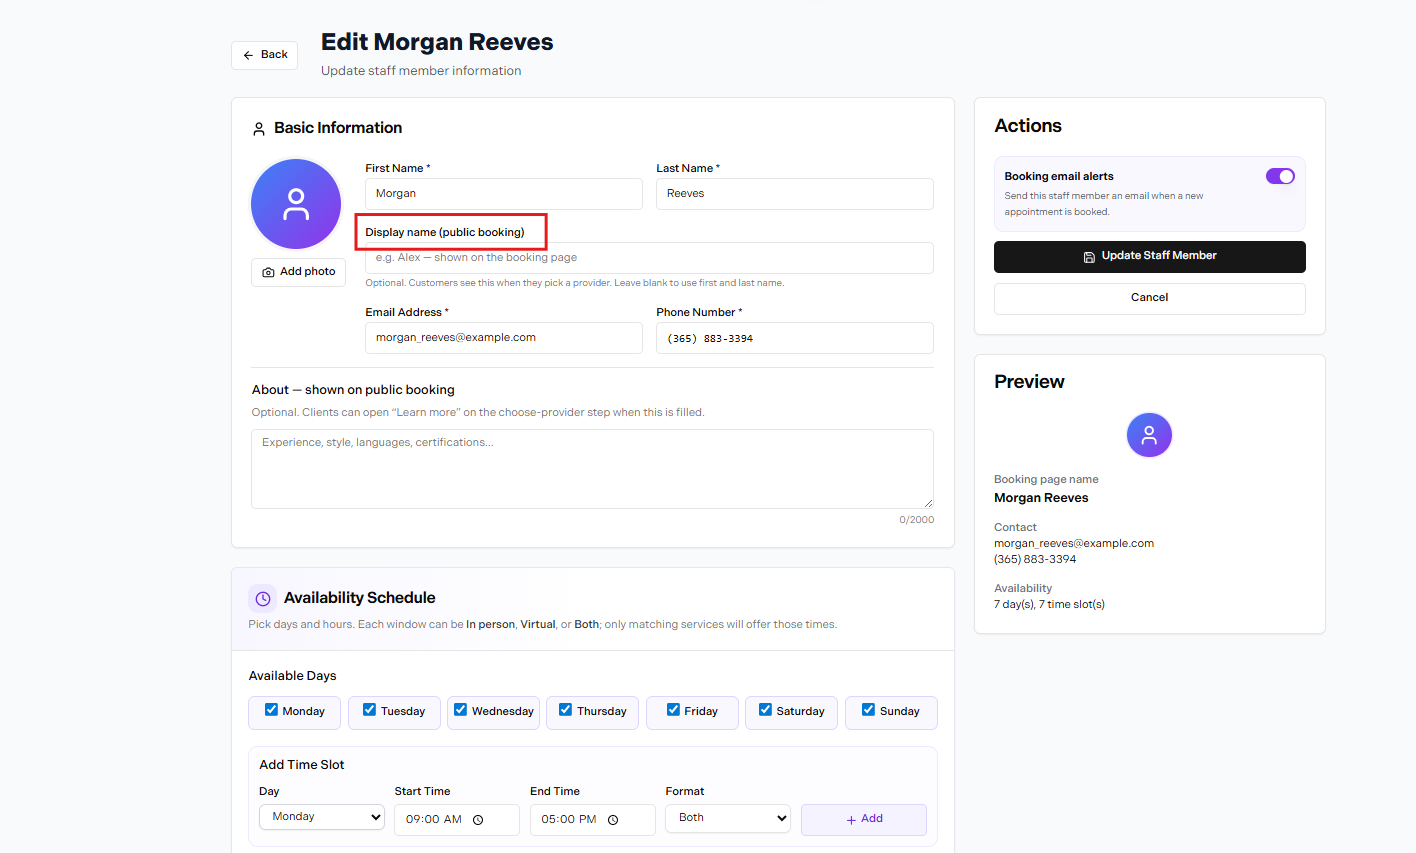
Display name field — optional, shown to clients on the booking page
The Display name (public booking) field lets you set a name that's different from the staff member's legal first and last name. The placeholder shows e.g. Alex — shown on the booking page.
Leave it blank to use first and last name
If the Display name field is left empty, Nuvoro automatically uses the staff member's First Name and Last Name on the booking page. You only need to fill it in if you want a different name shown to clients.
About — Shown on Public Booking
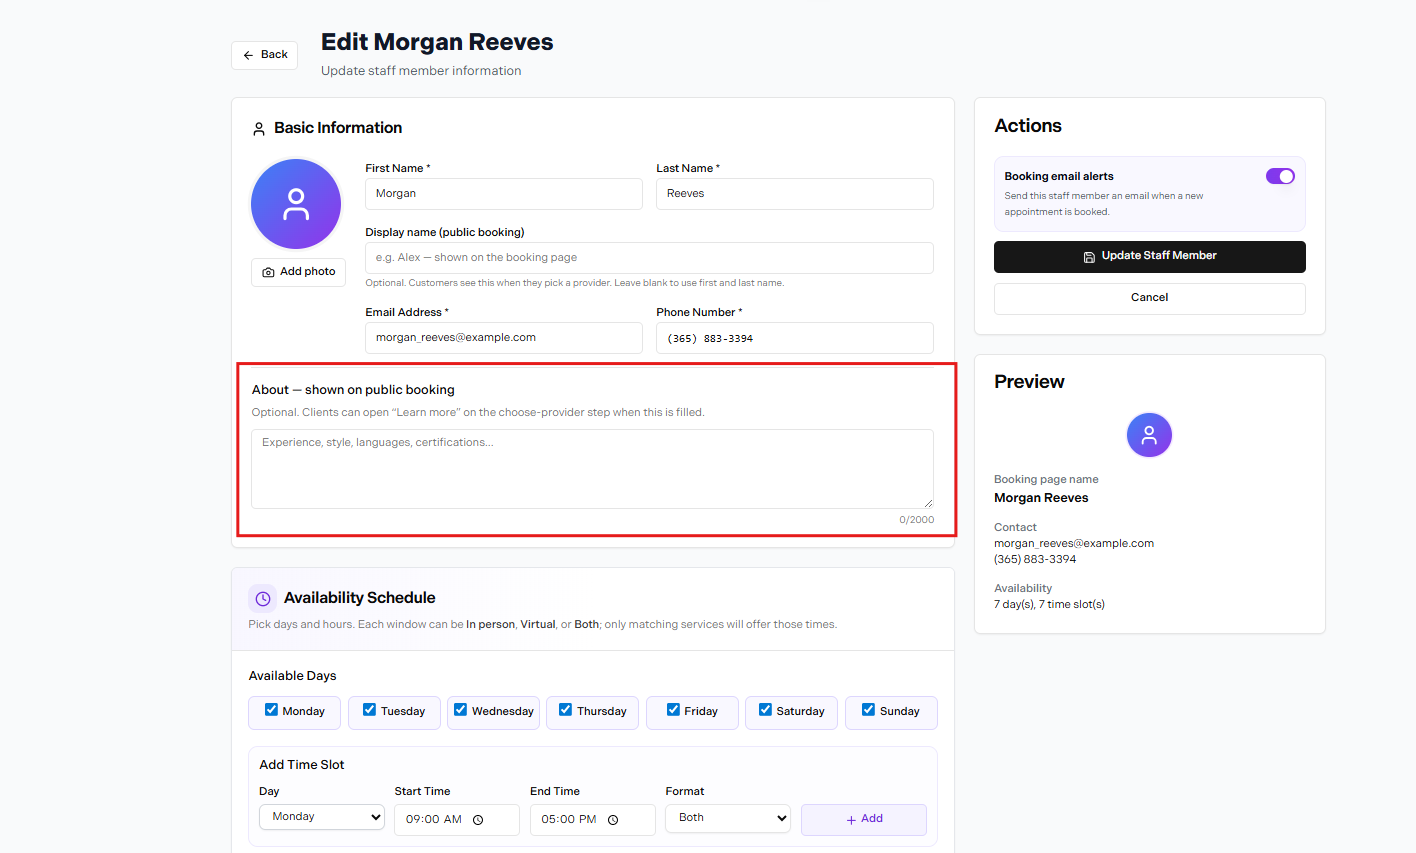
About field — optional bio shown to clients who click "Learn more"
The About section is an optional text area with a 2000-character limit. The placeholder reads Experience, style, languages, certifications...
When this field is filled in, clients can click Learn more on the choose-provider step of the booking page to read the staff member's bio before selecting them.
Booking Alert Emails
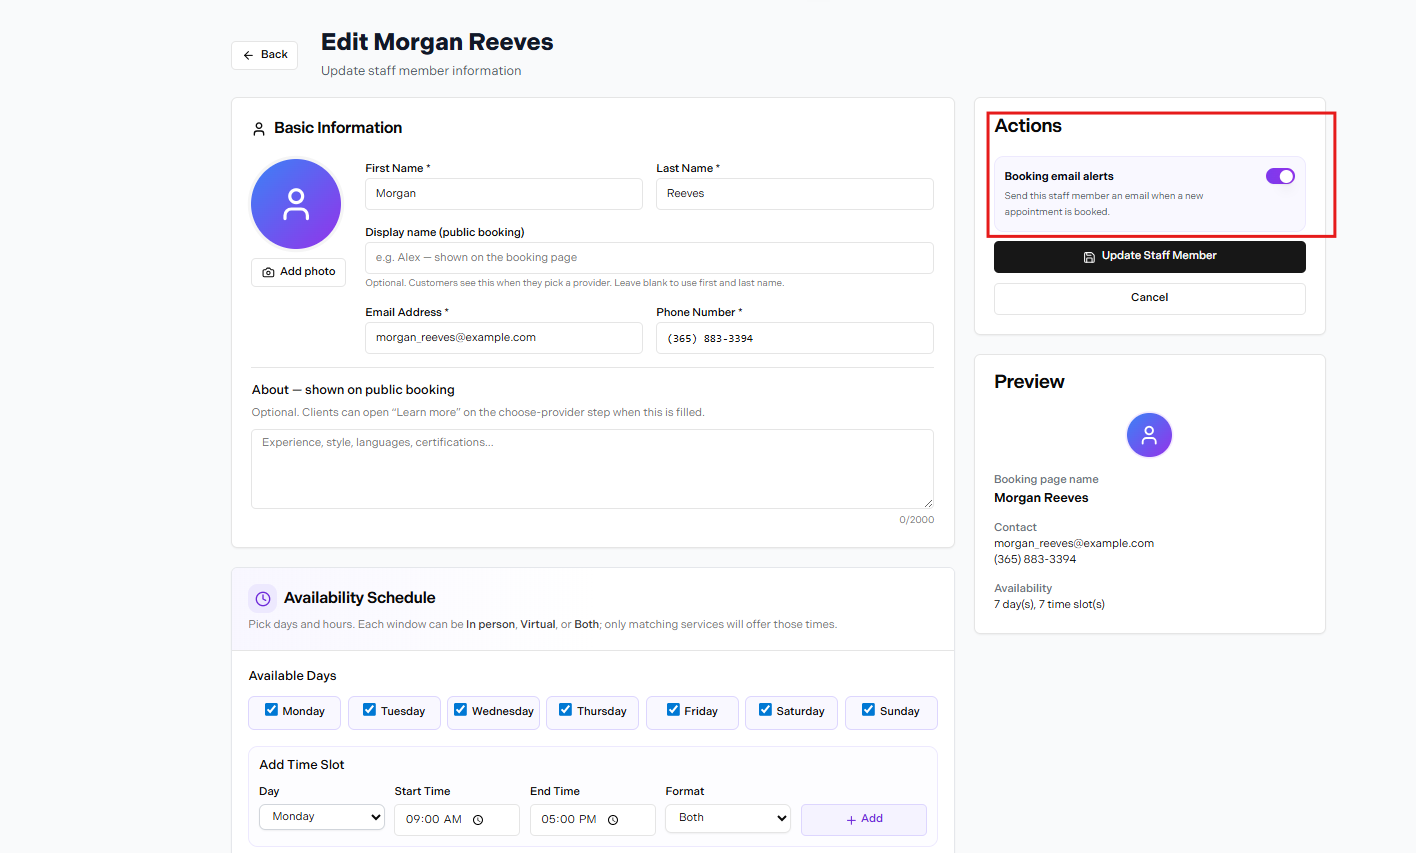
Actions panel — Booking email alerts toggle
In the Actions panel on the right side of the Edit Staff form, there is a Booking email alerts toggle. When enabled, the staff member receives an email each time a new appointment is booked with them.
Availability Schedule
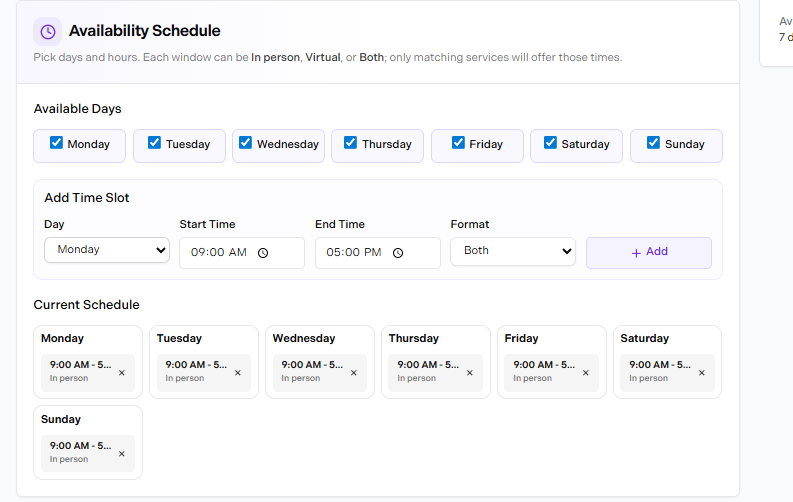
Availability Schedule — available days, add time slot, and current schedule
The Availability Schedule section controls when this staff member is bookable. The subtitle reads: Pick days and hours. Each window can be In person, Virtual, or Both; only matching services will offer those times.
Check the days this staff member works
Under Available Days, check Monday through Sunday as applicable. Unchecked days are unavailable for booking.
Add a time slot
Under Add Time Slot, choose a Day, set a Start Time and End Time, pick a Format (Both, In person, or Virtual), then click + Add.
Review the Current Schedule
Added slots appear under Current Schedule, grouped by day. Each slot shows the time range and format. Click the × on a slot to remove it.
Availability shown in the Preview panel
The Preview panel on the right updates automatically and shows the total, e.g. Availability · 7 day(s), 7 time slot(s).
In Person, Virtual, or Both
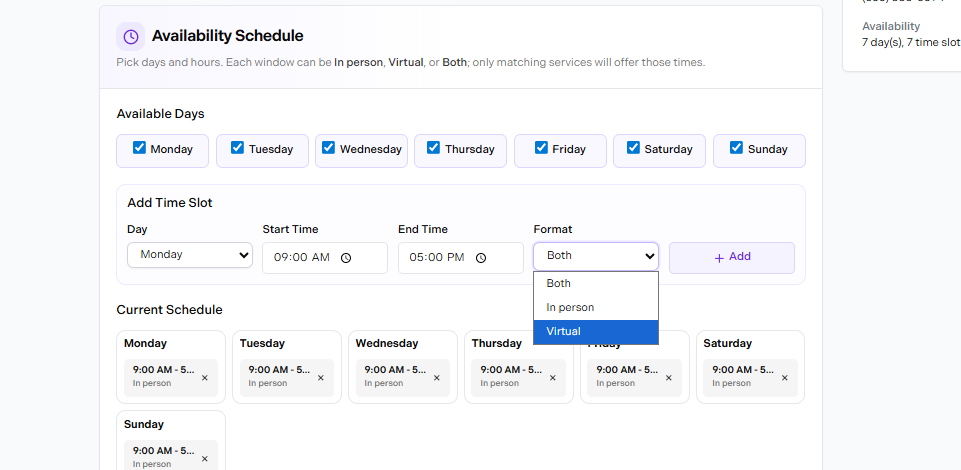
Format dropdown — Both, In person, Virtual
The Format dropdown in Add Time Slot has three options:
| Format | What it means |
|---|---|
| Both | Available for both in-person and virtual services during this window. |
| In person | Only available for in-person services during this window. |
| Virtual | Only available for virtual services during this window. |
Setting Different Hours Per Day
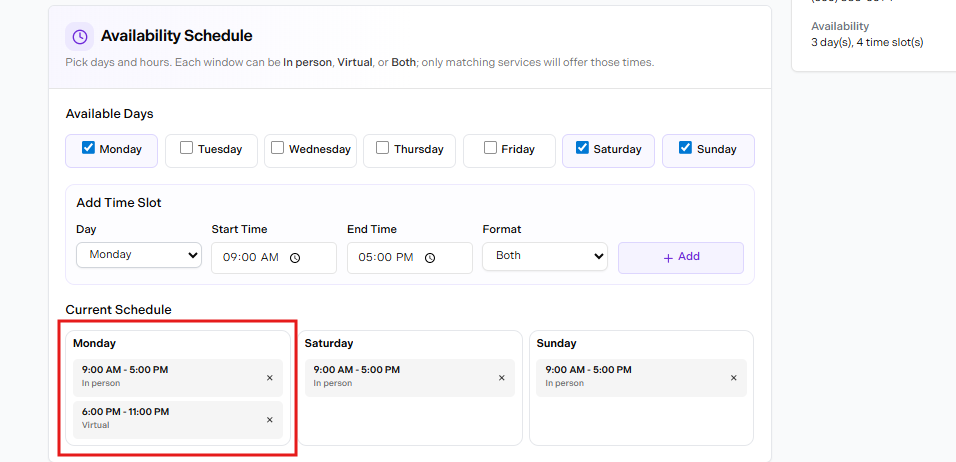
Current Schedule with multiple slots on Monday — In person 9 AM–5 PM and Virtual 6 PM–11 PM
You can add more than one time slot to the same day. In the example above, Monday has two slots: 9:00 AM – 5:00 PM · In person and 6:00 PM – 11:00 PM · Virtual. This lets you split a day between different formats or cover a split shift.
Each slot is independent — click the × next to any slot to remove it without affecting the others.
Managing Time Off & Holidays
To block time for a staff member — for a holiday, vacation, meeting, or personal time — use Block time from the calendar.
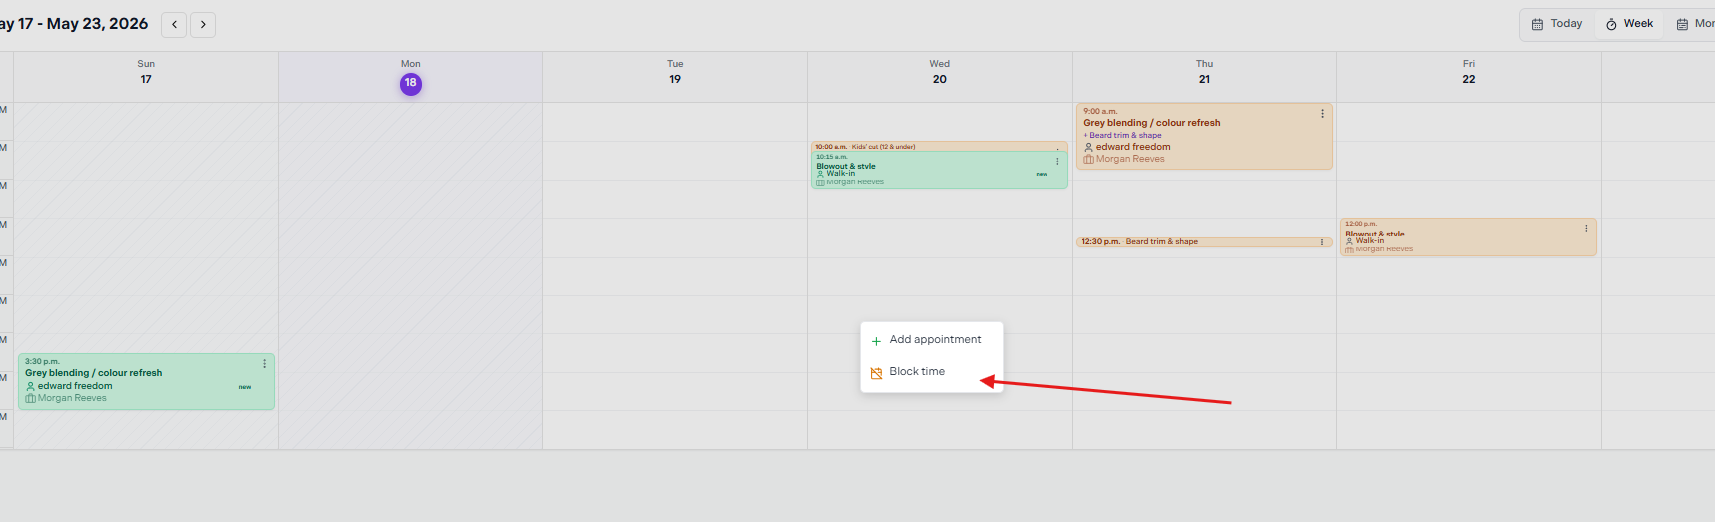
Click an empty slot on the calendar to reveal the Block time option
Click an empty slot on the calendar
A small menu appears with two options: Add appointment and Block time. Click Block time.
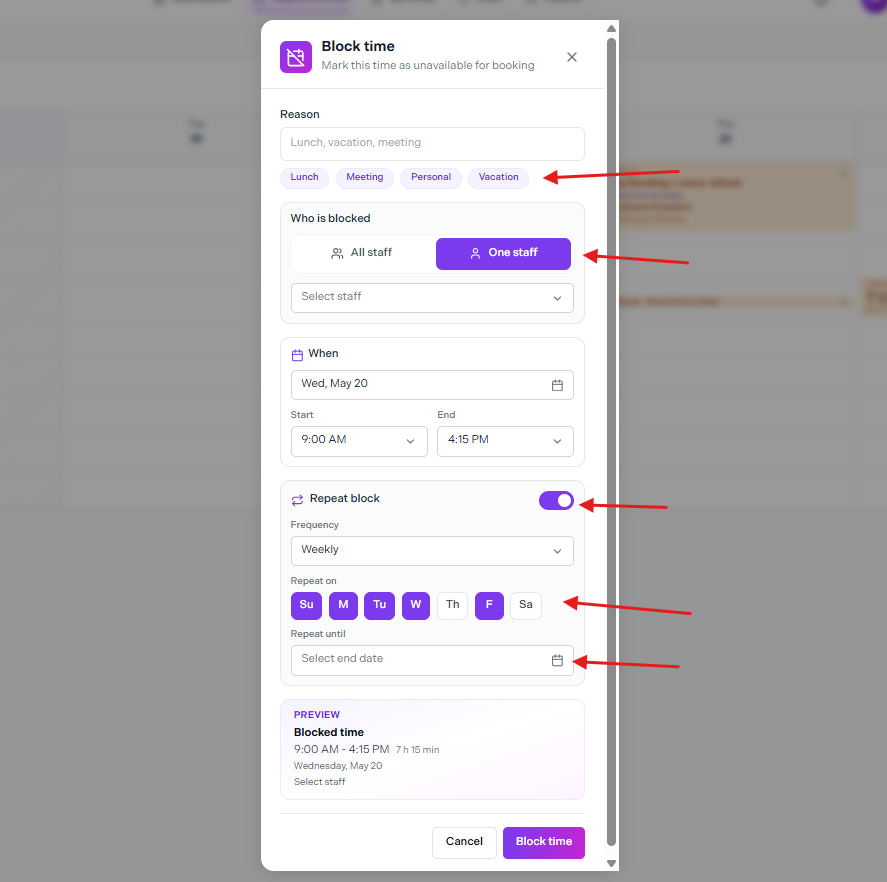
Block time modal — reason, who is blocked, when, and repeat options
Enter a reason
Type a reason or pick a quick tag: Lunch, Meeting, Personal, or Vacation.
Choose who is blocked
Select All staff or One staff. If One staff, pick the staff member from the dropdown.
Set the date and time
Under When, pick the date, start time, and end time.
Optionally repeat the block
Toggle Repeat block on to set a recurring block. Choose a Frequency (e.g. Weekly), which days to repeat on, and a Repeat until end date.
Click Block time
The Preview panel at the bottom of the modal confirms the details before you save.
Removing a Staff Member
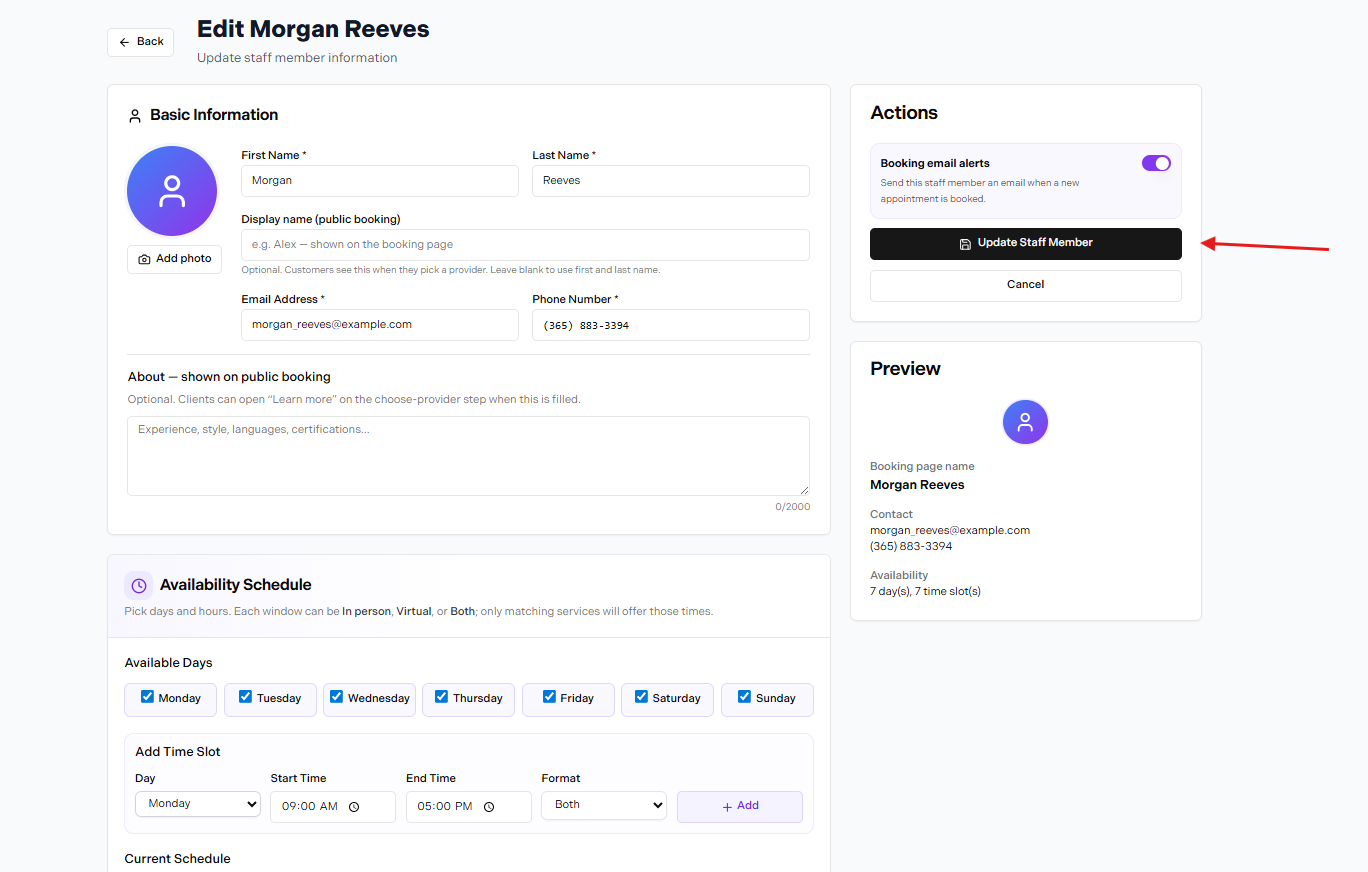
Step 1 — open the staff member's profile via Update Staff Member
Open the staff member's profile
From the staff list, click the staff member to open their profile. You can also reach it via the Update Staff Member button on the Edit Staff page.
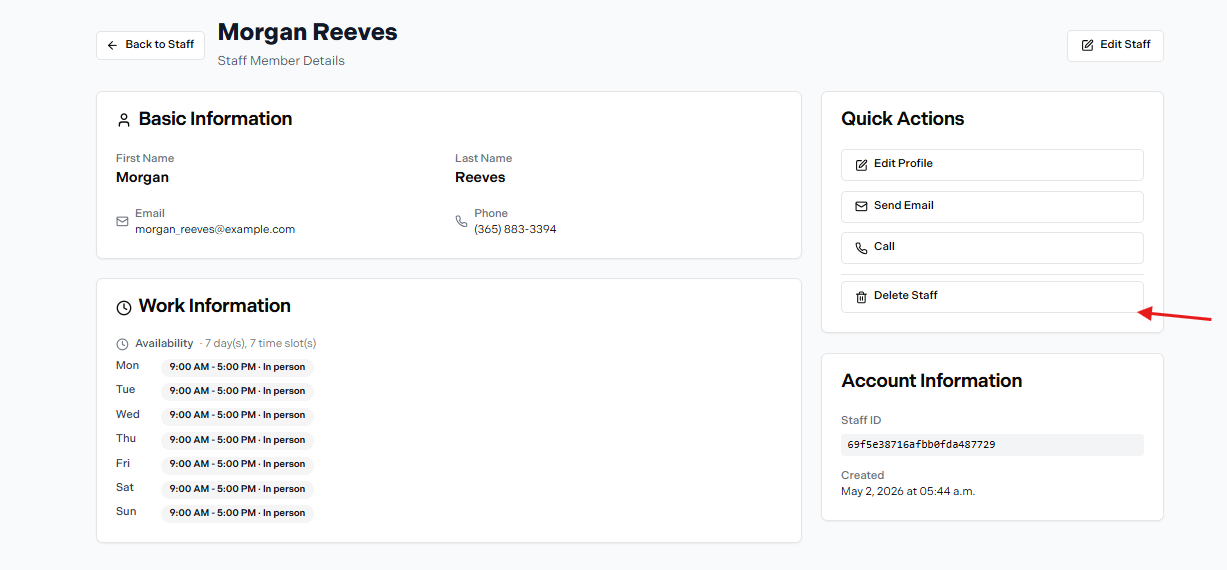
Step 2 — click Delete Staff in Quick Actions
Click Delete Staff
On the Staff Member Details page, find the Quick Actions panel on the right. It shows: Edit Profile, Send Email, Call, and Delete Staff. Click Delete Staff to remove them.
Check upcoming appointments first
Deleting a staff member does not automatically cancel or reassign their upcoming appointments. Review and handle any future bookings before completing the deletion.