Creating & Editing Services
Build your service menu — set pricing, duration, images, staff providers, and visibility. Includes archiving and restoring services.
In this article
Organising Services into Categories
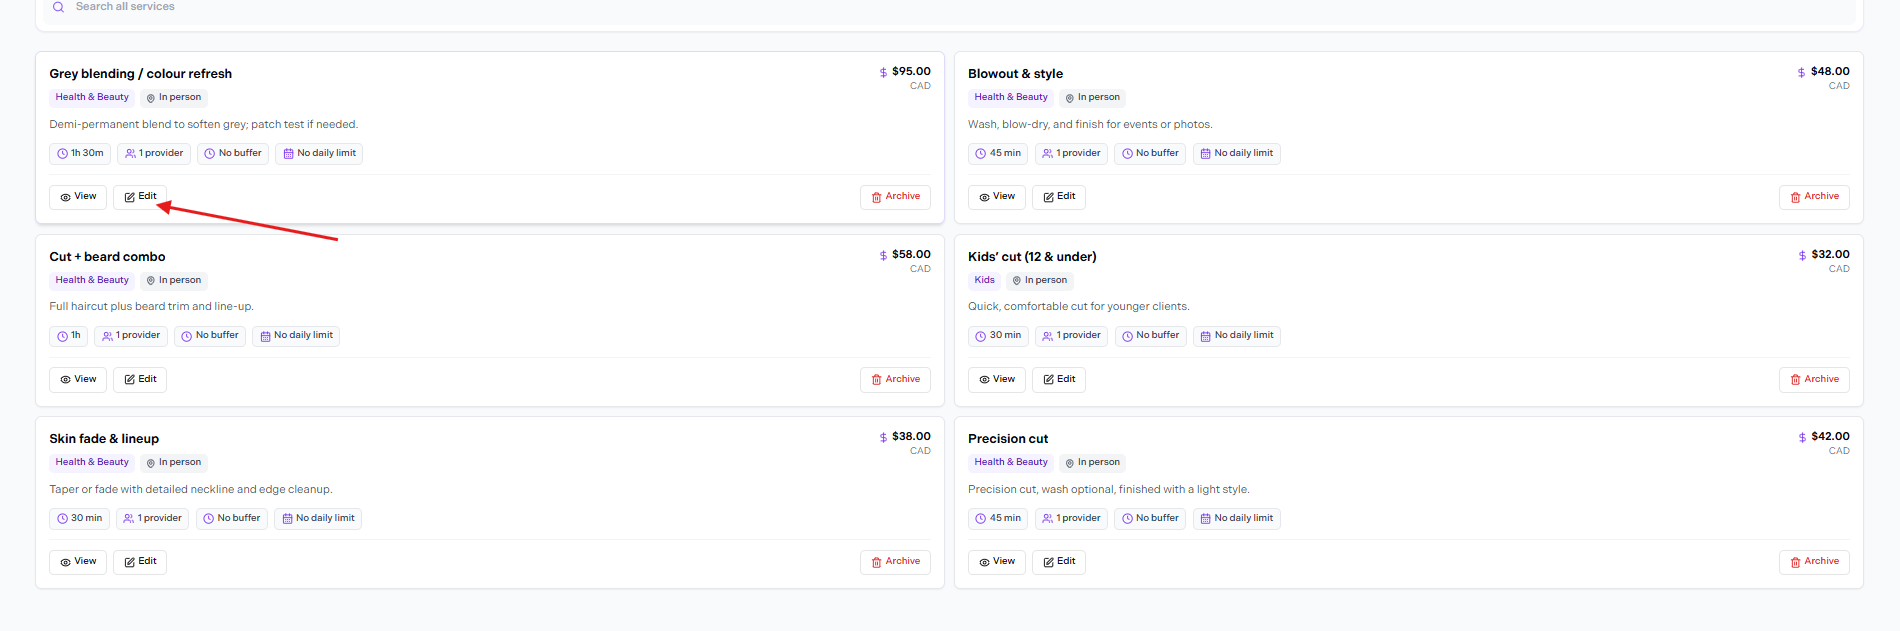
Services list — click Edit on a service to open the edit form
To assign a category, click Edit on a service card in the Services list. Each service card shows the service name, category tag, format, description, duration, providers, buffer, daily limit, and the View / Edit / Archive actions.
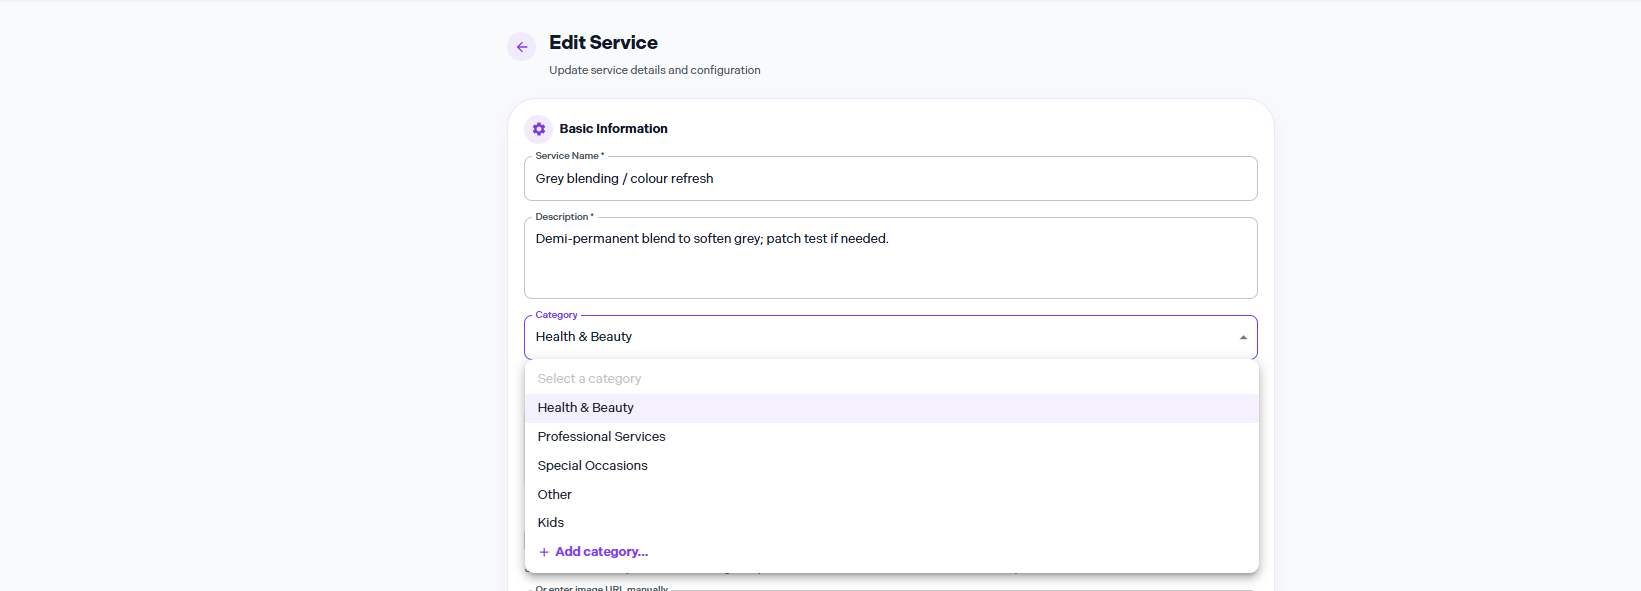
Edit Service — Category dropdown with existing categories and + Add category
Inside the Edit Service form, the Category dropdown lists your existing categories. In the example above: Health & Beauty, Professional Services, Special Occasions, Other, Kids. At the bottom of the list is + Add category... to create a new one.
Categories group services on your booking page
Services in the same category appear together under that heading on your public booking page, making it easier for clients to browse a large menu.
Service Image & Gallery
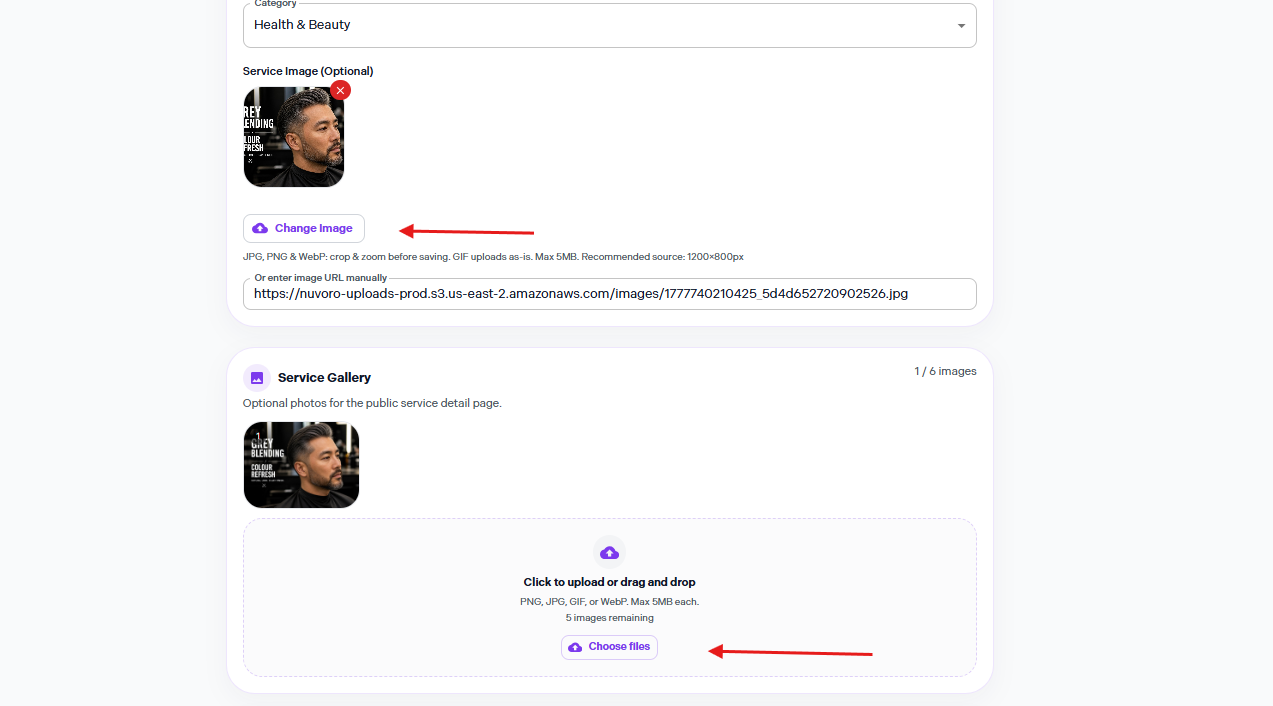
Service Image and Service Gallery sections in the Edit Service form
Service Image (Optional) — Upload a cover photo or paste a URL. Supported formats: JPG, PNG, WebP (crop & zoom before saving), GIF (uploads as-is). Max 5 MB. Recommended source size: 1200×800 px. Click Change Image to replace an uploaded photo.
Service Gallery — Optional additional photos shown on the public service detail page. Supports PNG, JPG, GIF, WebP up to 5 MB each. You can upload up to 6 images total. Click Choose files or drag and drop into the upload area. The counter (e.g. 1 / 6 images) updates as you add photos.
Free vs. Paid — Setting Your Price
.png)
Price set to FREE — clients will see "Free" on the booking page
In the Pricing & Duration section, the Price field has two options:
| Option | What happens |
|---|---|
| FREE | Clients will see "Free" for this service. No amount field shown. |
| PAID | An Amount (CAD) field appears. Enter the price. A Price label selector also appears: Exact, Starting at, or Up to — shown next to the price on the public booking page (e.g. "Starting at $80"). |
.png)
Price set to PAID — Amount (CAD) and Price label fields appear
Quoted / Custom Service Pricing

Quoted / custom service enabled — minimum/maximum hours and custom booking availability
At the top of the Pricing & Duration section is the Quoted / custom service toggle. The description reads: For rentals or custom work. Customers choose a booking length; staff sets the final price on the appointment.
When enabled (toggle shows Quoted), the Duration field changes to Minimum hours and Maximum hours. The Price section shows a Price set on appointment notice: customers see it as a quoted service and staff sets the final price from the appointment or checkout.
A Custom booking availability section also appears below — quoted services use these hours instead of staff schedules. Toggle each day on and set start/end times.
Duration & Buffer Time
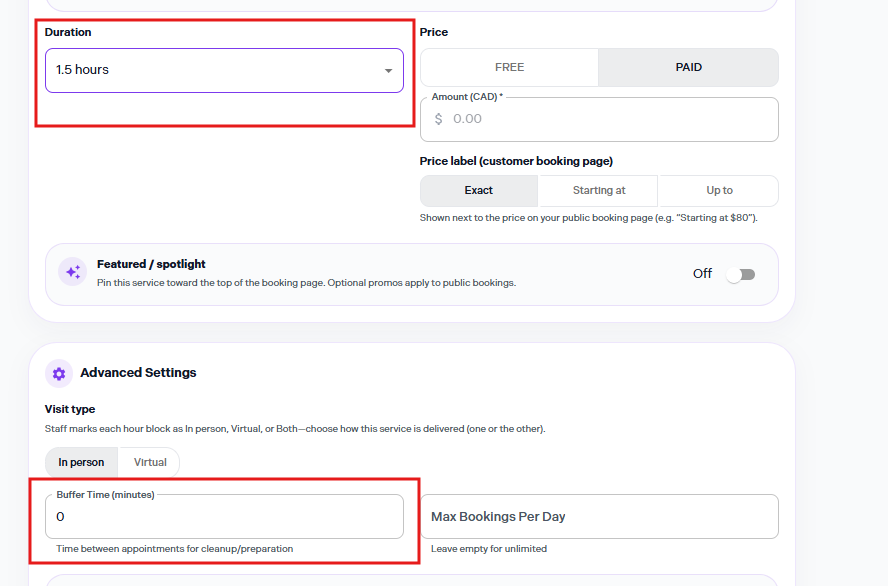
Duration dropdown and Buffer Time field in Advanced Settings
| Field | Details |
|---|---|
| Duration | How long the service blocks on the calendar. Chosen from a dropdown (e.g. 1.5 hours). |
| Buffer Time (minutes) | In Advanced Settings. Time between appointments for cleanup/preparation. The helper text reads: Time between appointments for cleanup/preparation. Leave at 0 for no buffer. |
Featured / Spotlight

Featured / spotlight toggle — Off by default
The Featured / spotlight section sits below the pricing fields. The description reads: Pin this service toward the top of the booking page. Optional promos apply to public bookings. The toggle is Off by default.

Toggle switched to Featured — Ribbon text and Apply promo price fields appear
When turned on (toggle shows Featured), two extra fields appear:
- Ribbon text — optional label shown on the public service card (e.g. "25 OFF").
- Apply promo price — toggle to offer a discounted price alongside the feature.

Promo applied — Ribbon text "25 OFF", Percent off 25%, preview shows "Customers see 25% off"
With Apply promo price on, a discount type dropdown appears (e.g. Percent off) and a Percent field. A preview chip at the bottom confirms what clients will see — e.g. Customers see 25% off.
Advanced Settings
The Advanced Settings section contains visit type, buffer time, and max bookings.
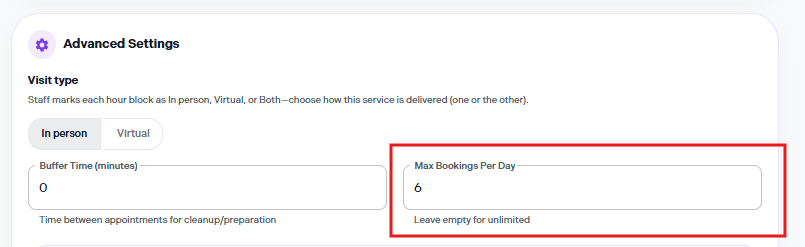
Advanced Settings — Visit type, Buffer Time, and Max Bookings Per Day
| Setting | Details |
|---|---|
| Visit type | In person or Virtual. Staff marks each hour block with a matching format; only matching slots will offer this service. The note reads: Staff marks each hour block as In person, Virtual, or Both — choose how this service is delivered (one or the other). |
| Buffer Time (minutes) | Gap after the service for cleanup/preparation. Defaults to 0. |
| Max Bookings Per Day | Cap how many times this service can be booked in a single day. Helper text: Leave empty for unlimited. Enter a number (e.g. 6) to set a cap. |
Service Status (Active / Inactive)
.png)
Service Status toggle — Active means the service is visible and bookable
The Service Status toggle is inside Advanced Settings. When Active, the label reads: Service is visible and bookable. Toggle it off to make the service inactive — it will be hidden from customers and cannot be booked publicly.
Assign Staff as Providers
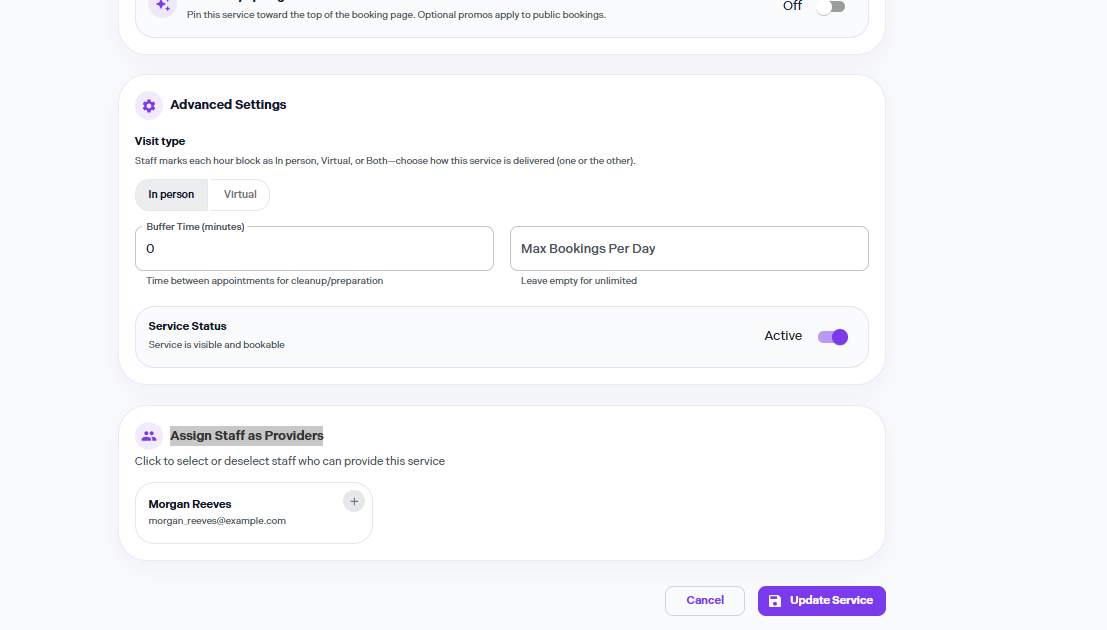
Assign Staff as Providers — staff cards with + to add
The Assign Staff as Providers section is at the bottom of the Edit Service form. The instruction reads: Click to select or deselect staff who can provide this service. Each staff member appears as a card. Click a card to select them.

Staff member selected — green checkmark, shown under Selected Providers
A selected staff member's card turns green with a checkmark. A Selected Providers list appears below showing the chosen names as chips (with × to remove each). Click Clear all to remove all providers at once. Click Update Service to save.
Archiving & Restoring a Service
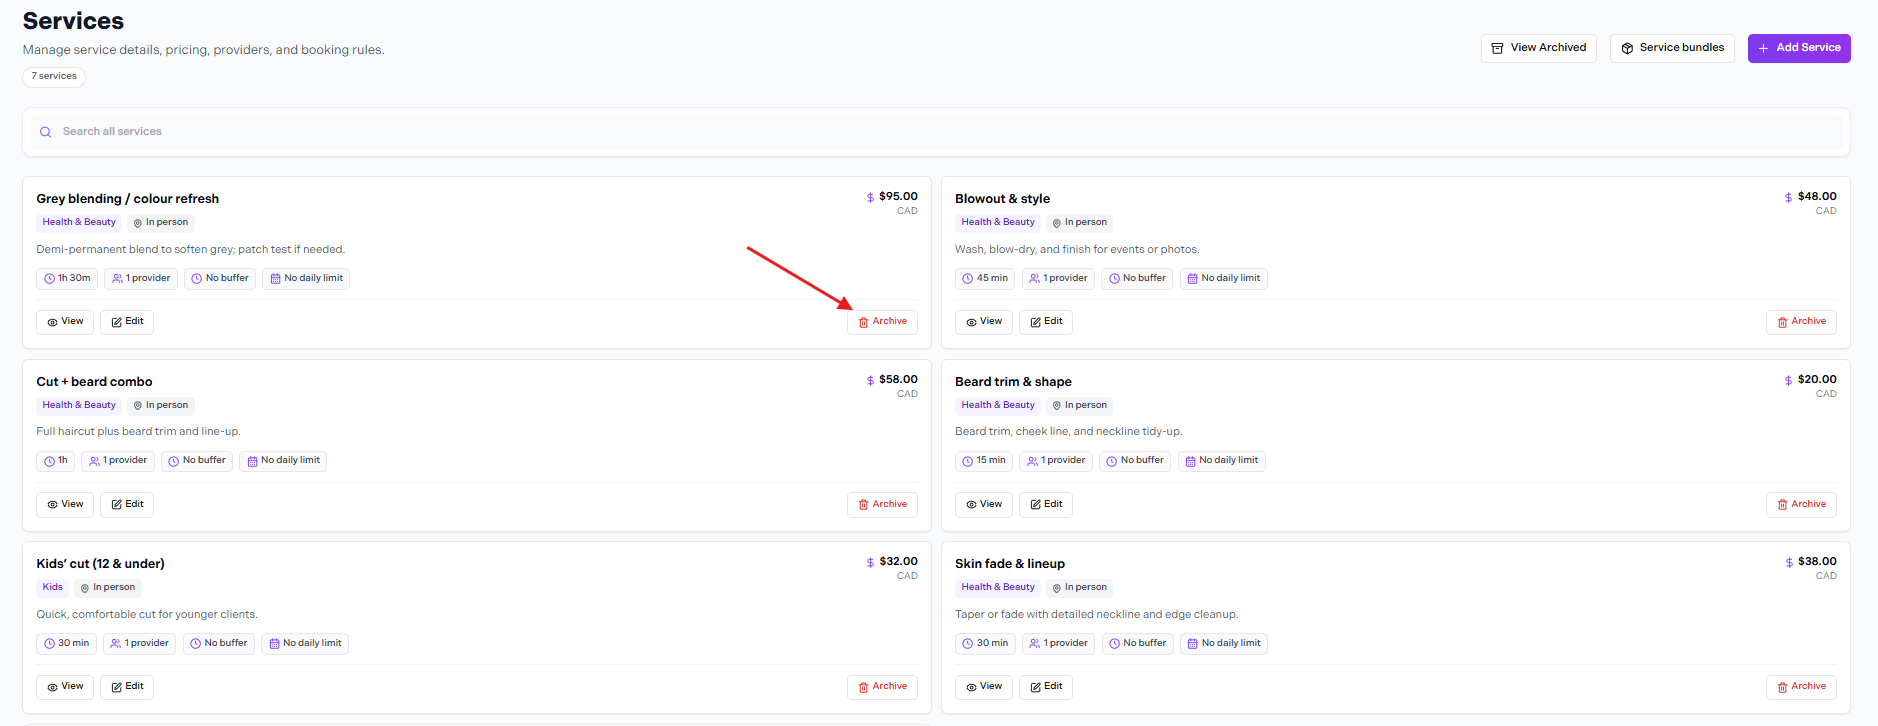
Services list — Archive button on each service card
Each service card in the Services list has an Archive button. Clicking it hides the service from customers — it can no longer be booked. The service is not permanently deleted; it moves to the Archived list.
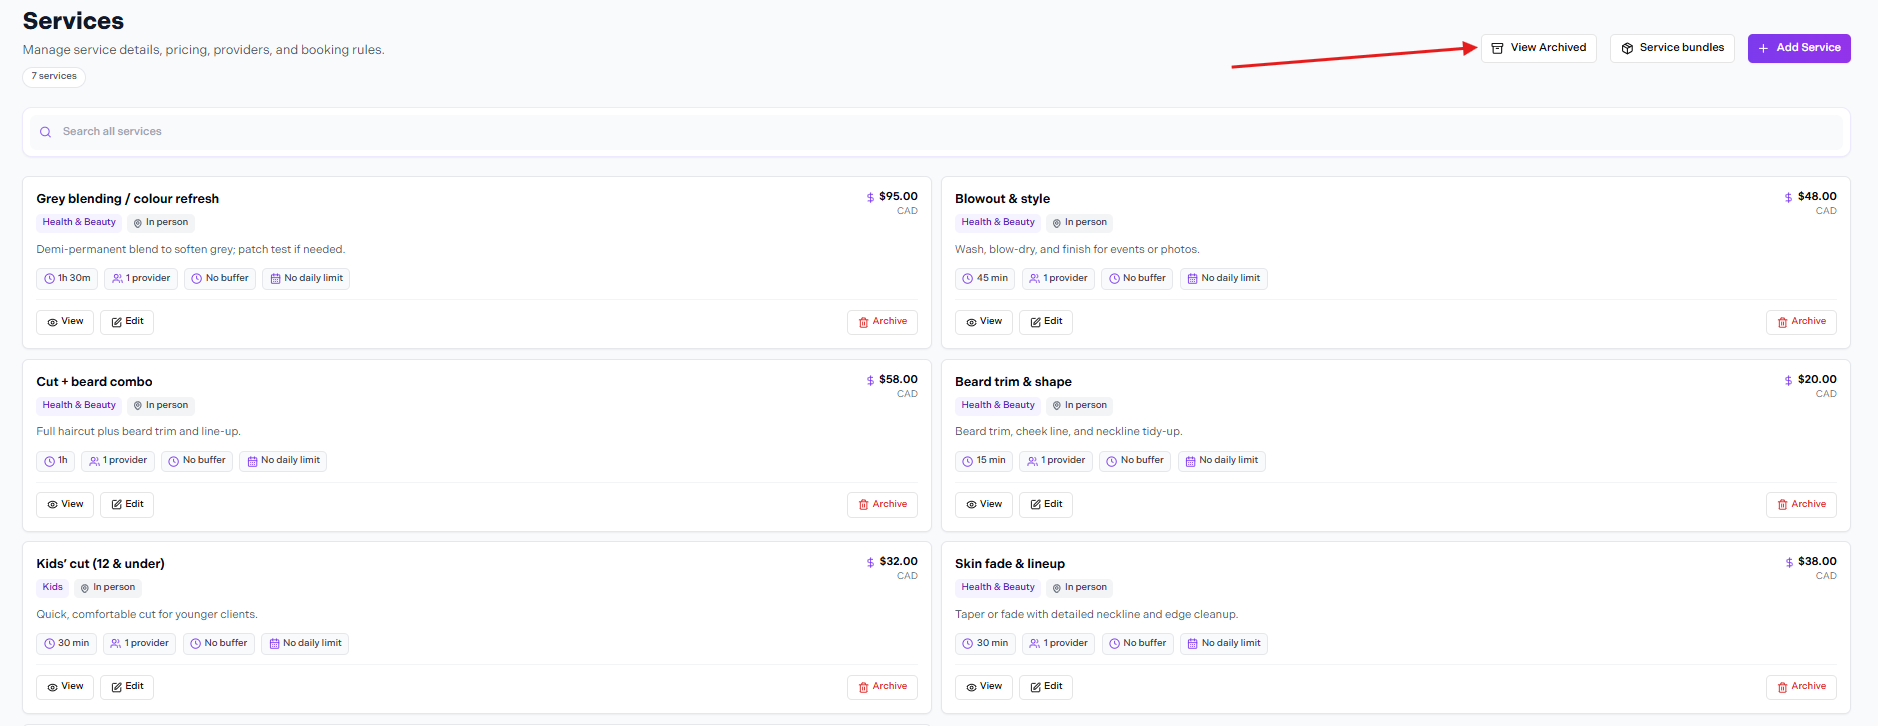
Click View Archived in the top-right to see archived services
To find archived services, click View Archived in the top-right of the Services page (next to Service bundles and + Add Service).

Archived Services page — Restore or Delete Forever
The Archived Services page shows: These services are hidden from customers and cannot be booked. You can restore them to make them available again, or permanently delete them. Each archived service shows its category, duration, price, providers, and the date it was archived.
Click Restore to make the service active again. Click Delete Forever to permanently remove it.